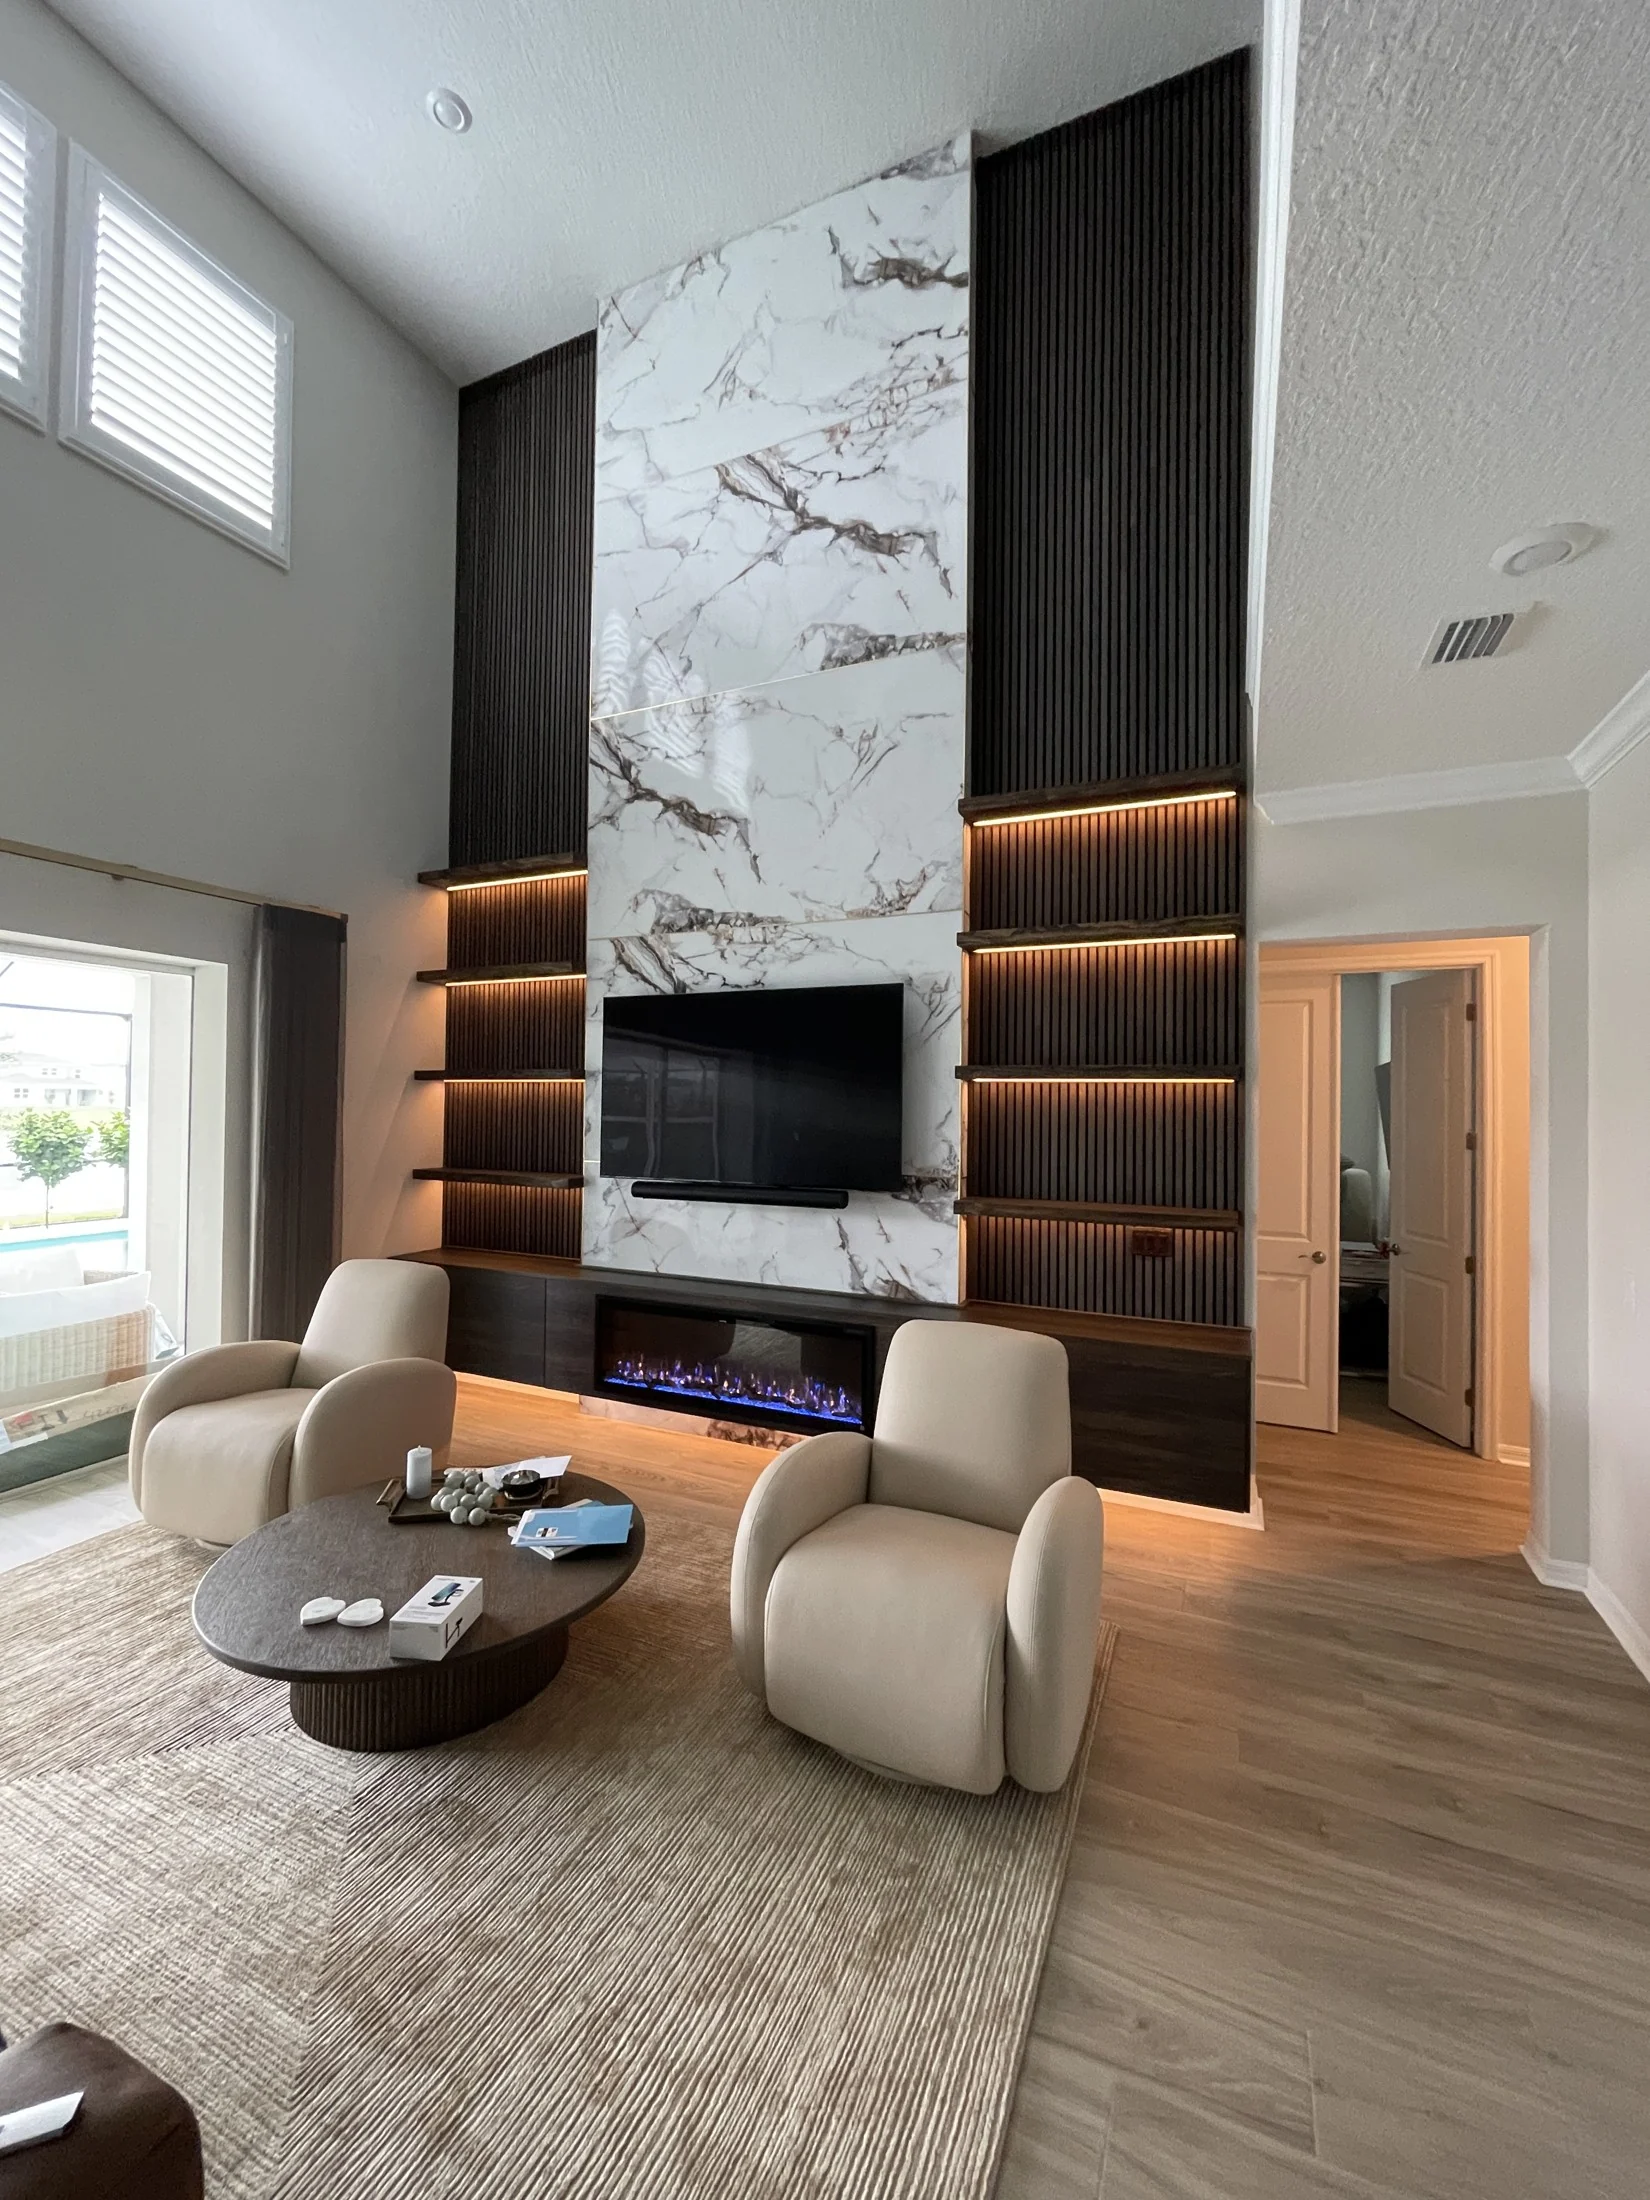
A double-height wall can be the largest surface in a living room while still feeling disconnected from the furniture below it. In this Wall Design Solutions project, the original television and freestanding console occupied only the lower part of a tall, plain wall. The finished composition brings the full height into the room through a marble-look center, dark vertical slats, fitted storage, a fireplace and illuminated shelving.
The photographs below document the actual project before work, during construction and after completion. They show how the main wall treatment and the later shelving and cabinetry fit into one composition.
Before: a television on a largely empty wall
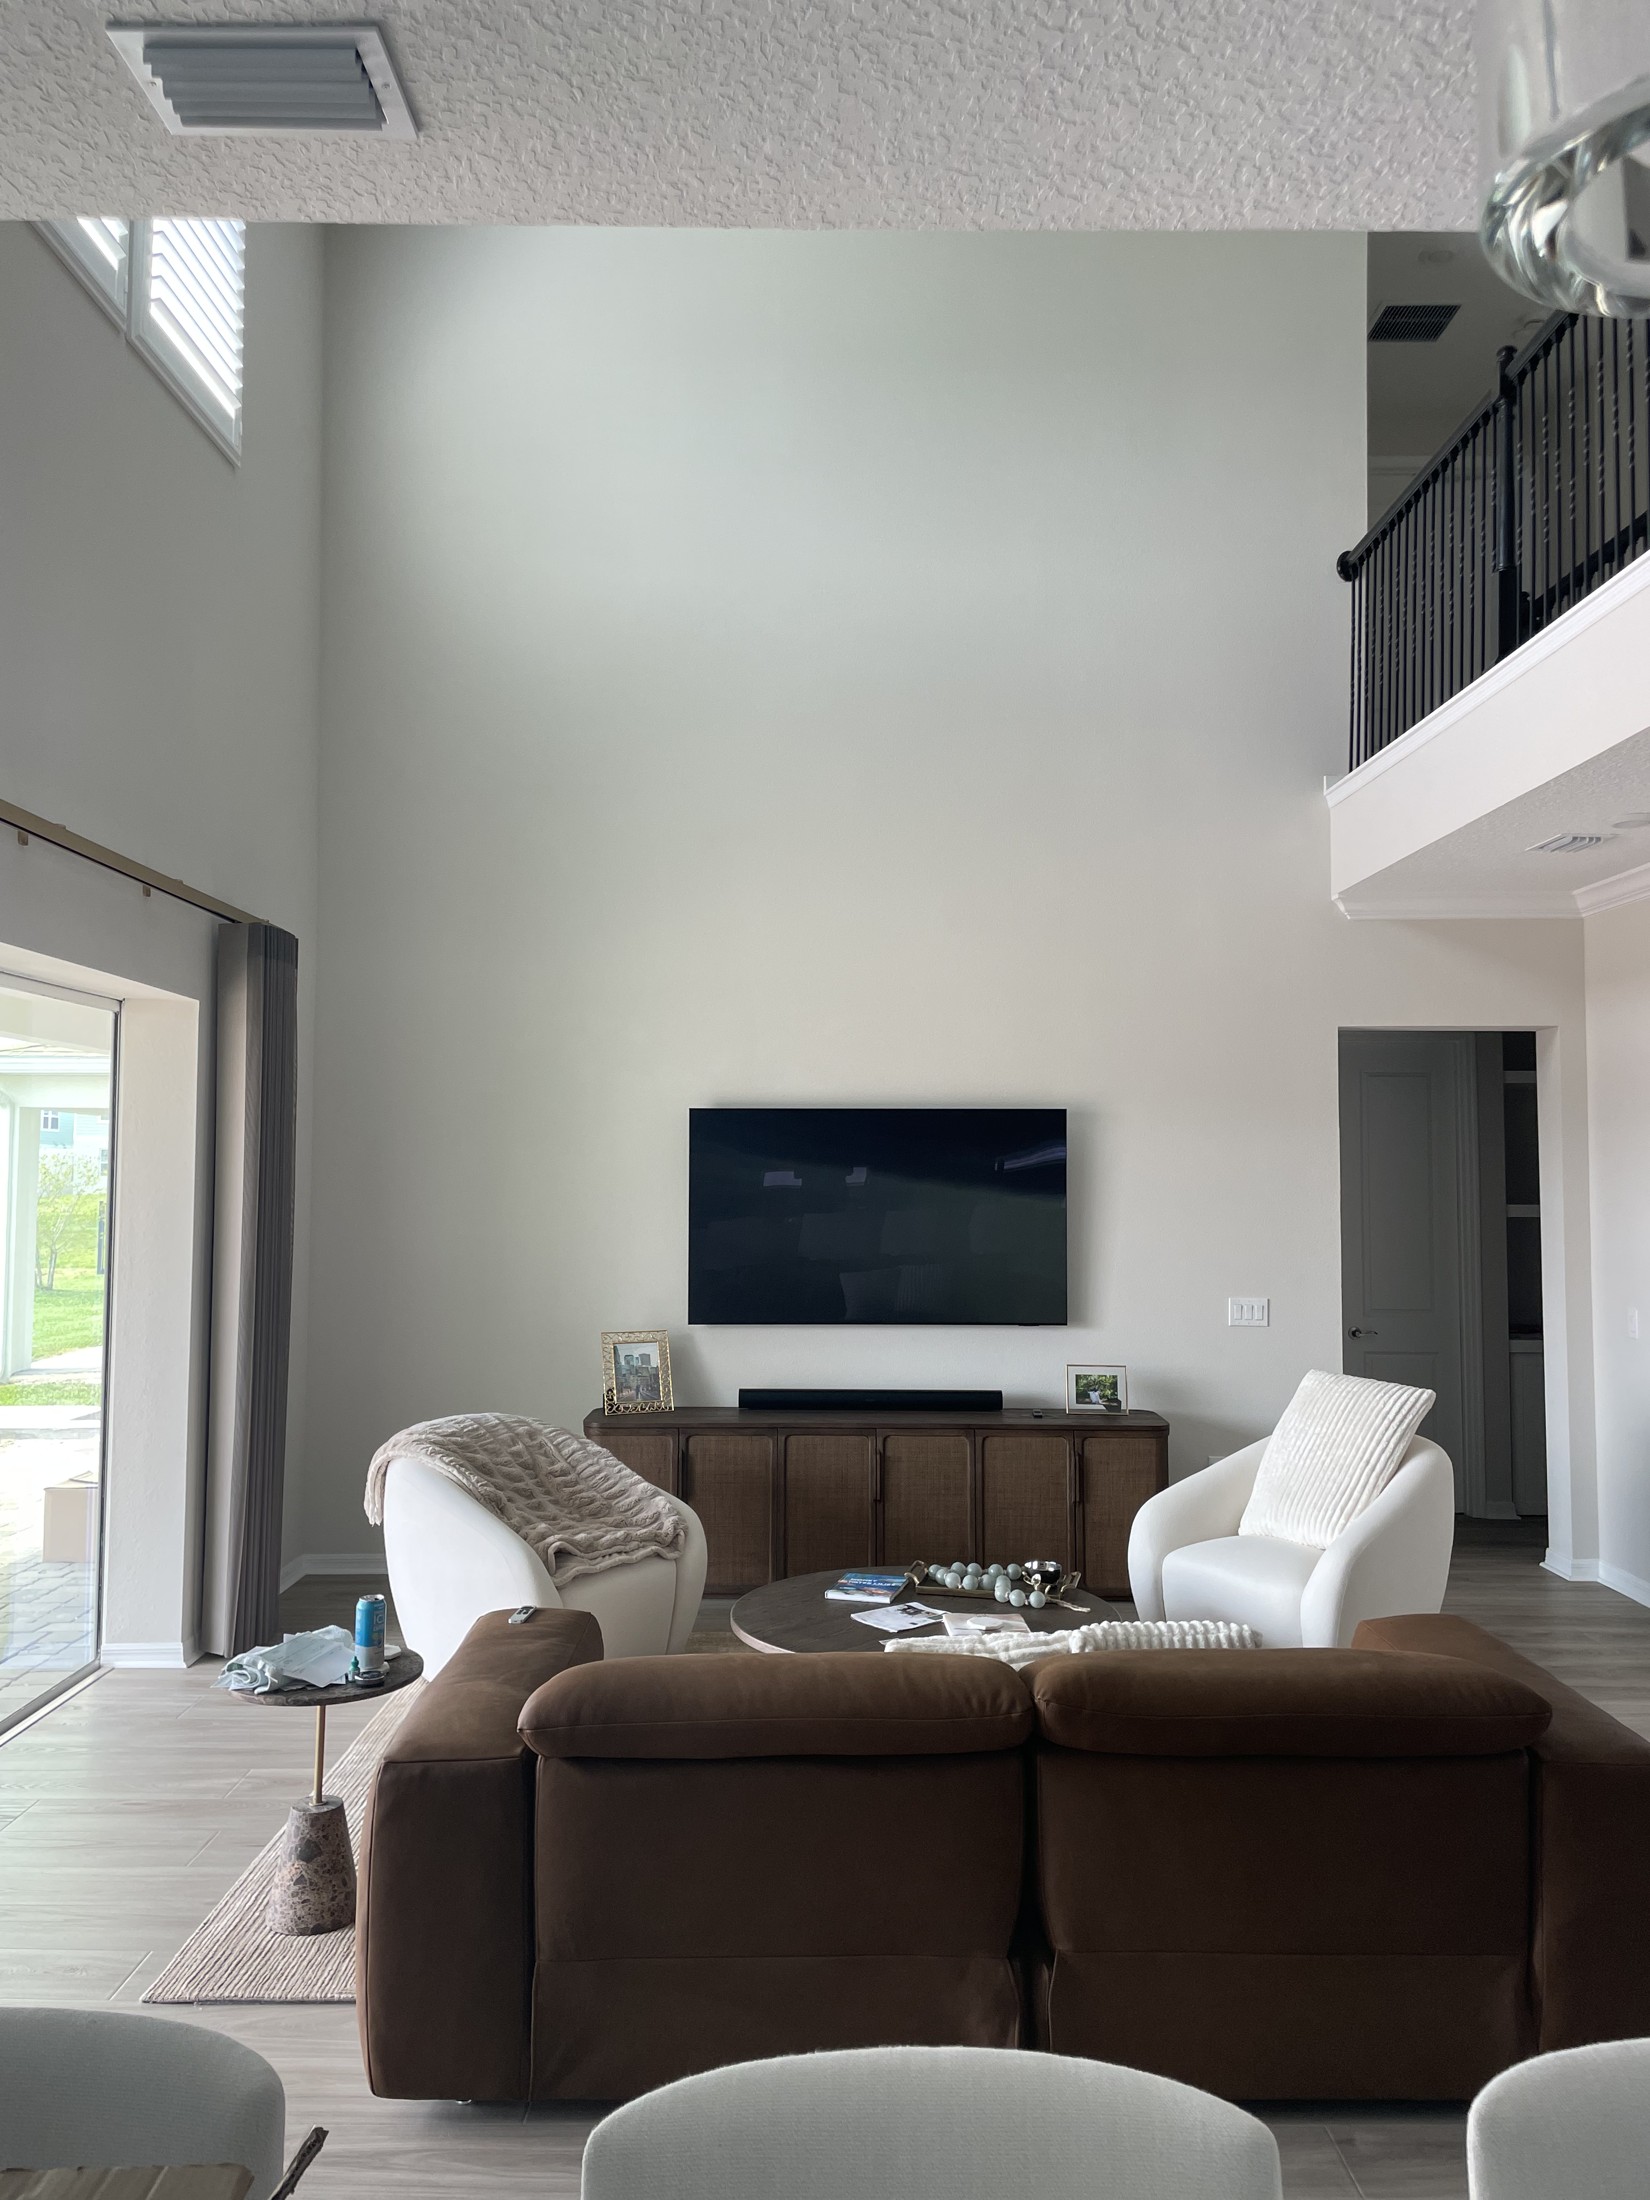
*Before: the television and console sit low on a plain wall, with windows to the left and an upper-level railing to the right.*
The starting room already had strong architectural features: a high ceiling, large windows and an open upper-level edge. The wall itself had little detail beyond the television. A low console provided a horizontal line, but most of the surface above it remained visually separate from the seating area.
The redesign changes that relationship by creating a central vertical feature and using darker side sections to frame it. Rather than covering the wall with several competing patterns, the composition gives each element a clear role.
Building the central feature
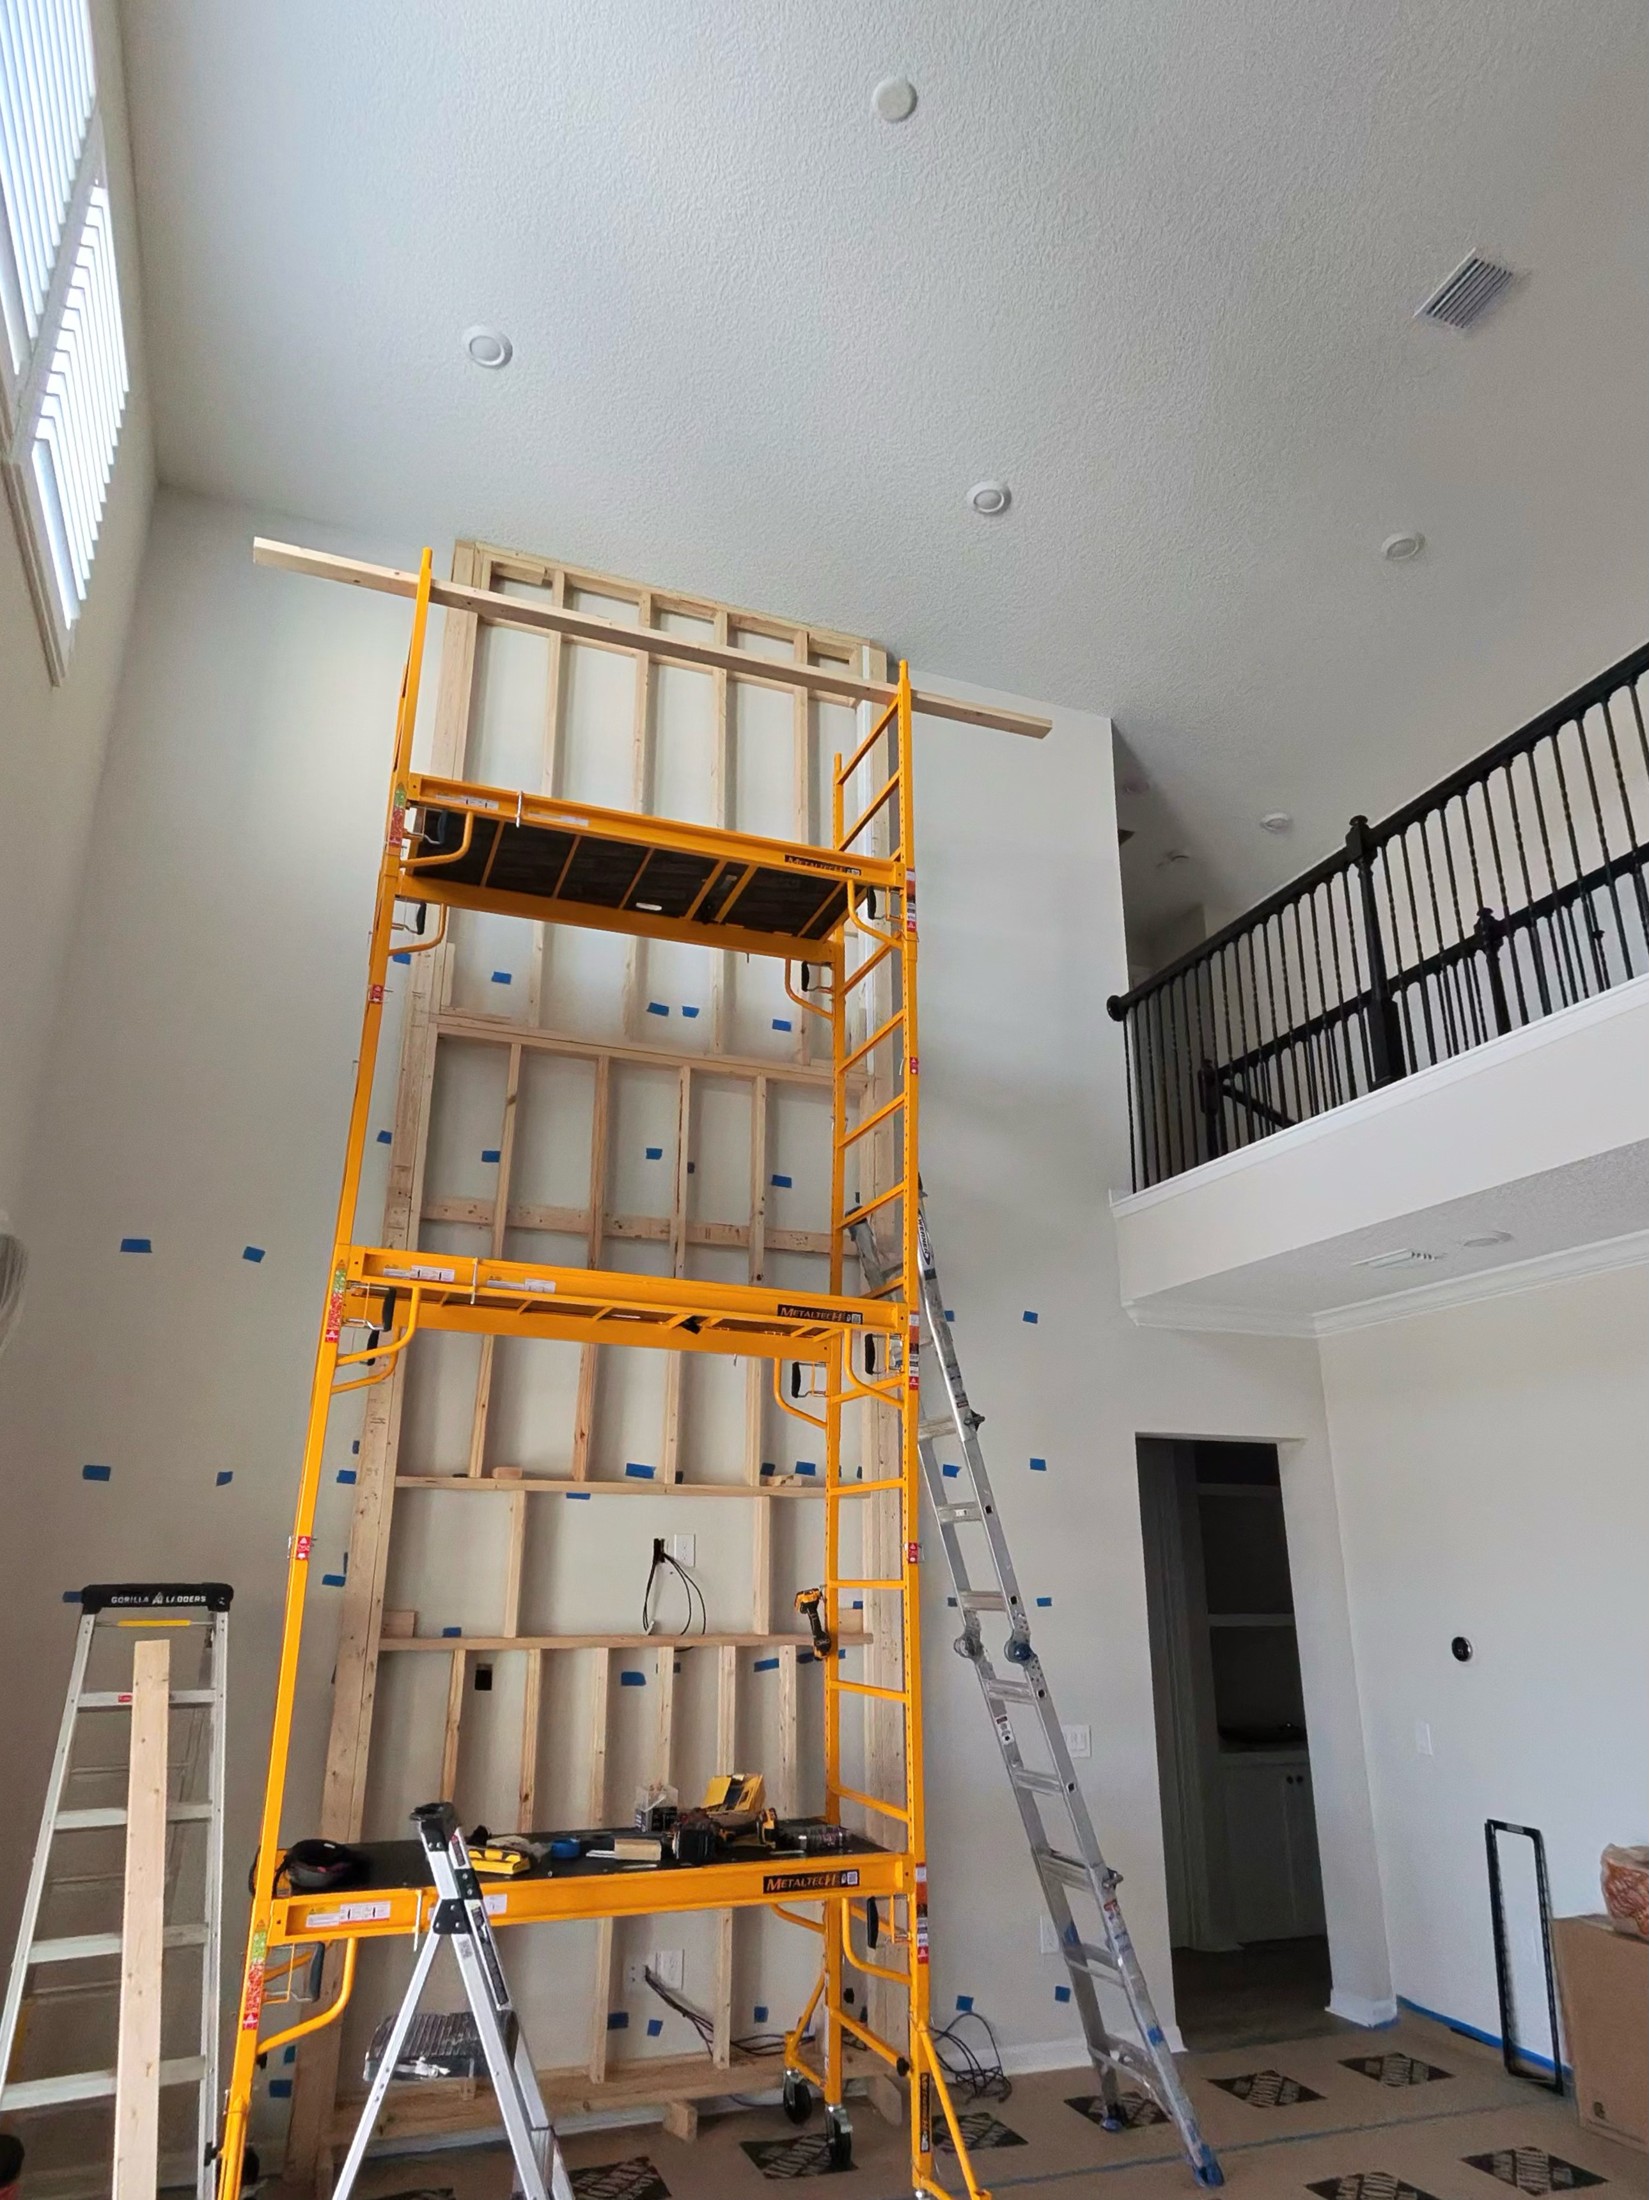
*During construction: the central framing is visible before the decorative surface is fitted.*
The construction photographs show a framed central section extending up the wall, with scaffolding used to reach the upper area. Floor protection is visible while work is underway. At this stage, the eventual depth and position of the central feature can be understood before the finish covers it.
For homeowners considering a similar wall, this is a useful distinction: a finished photograph shows the surface, while the build also involves the structure and coordination behind it. Tall-room access is part of the project scope, not simply an extra quantity of decorative material.
Adding the marble-look face and dark slats
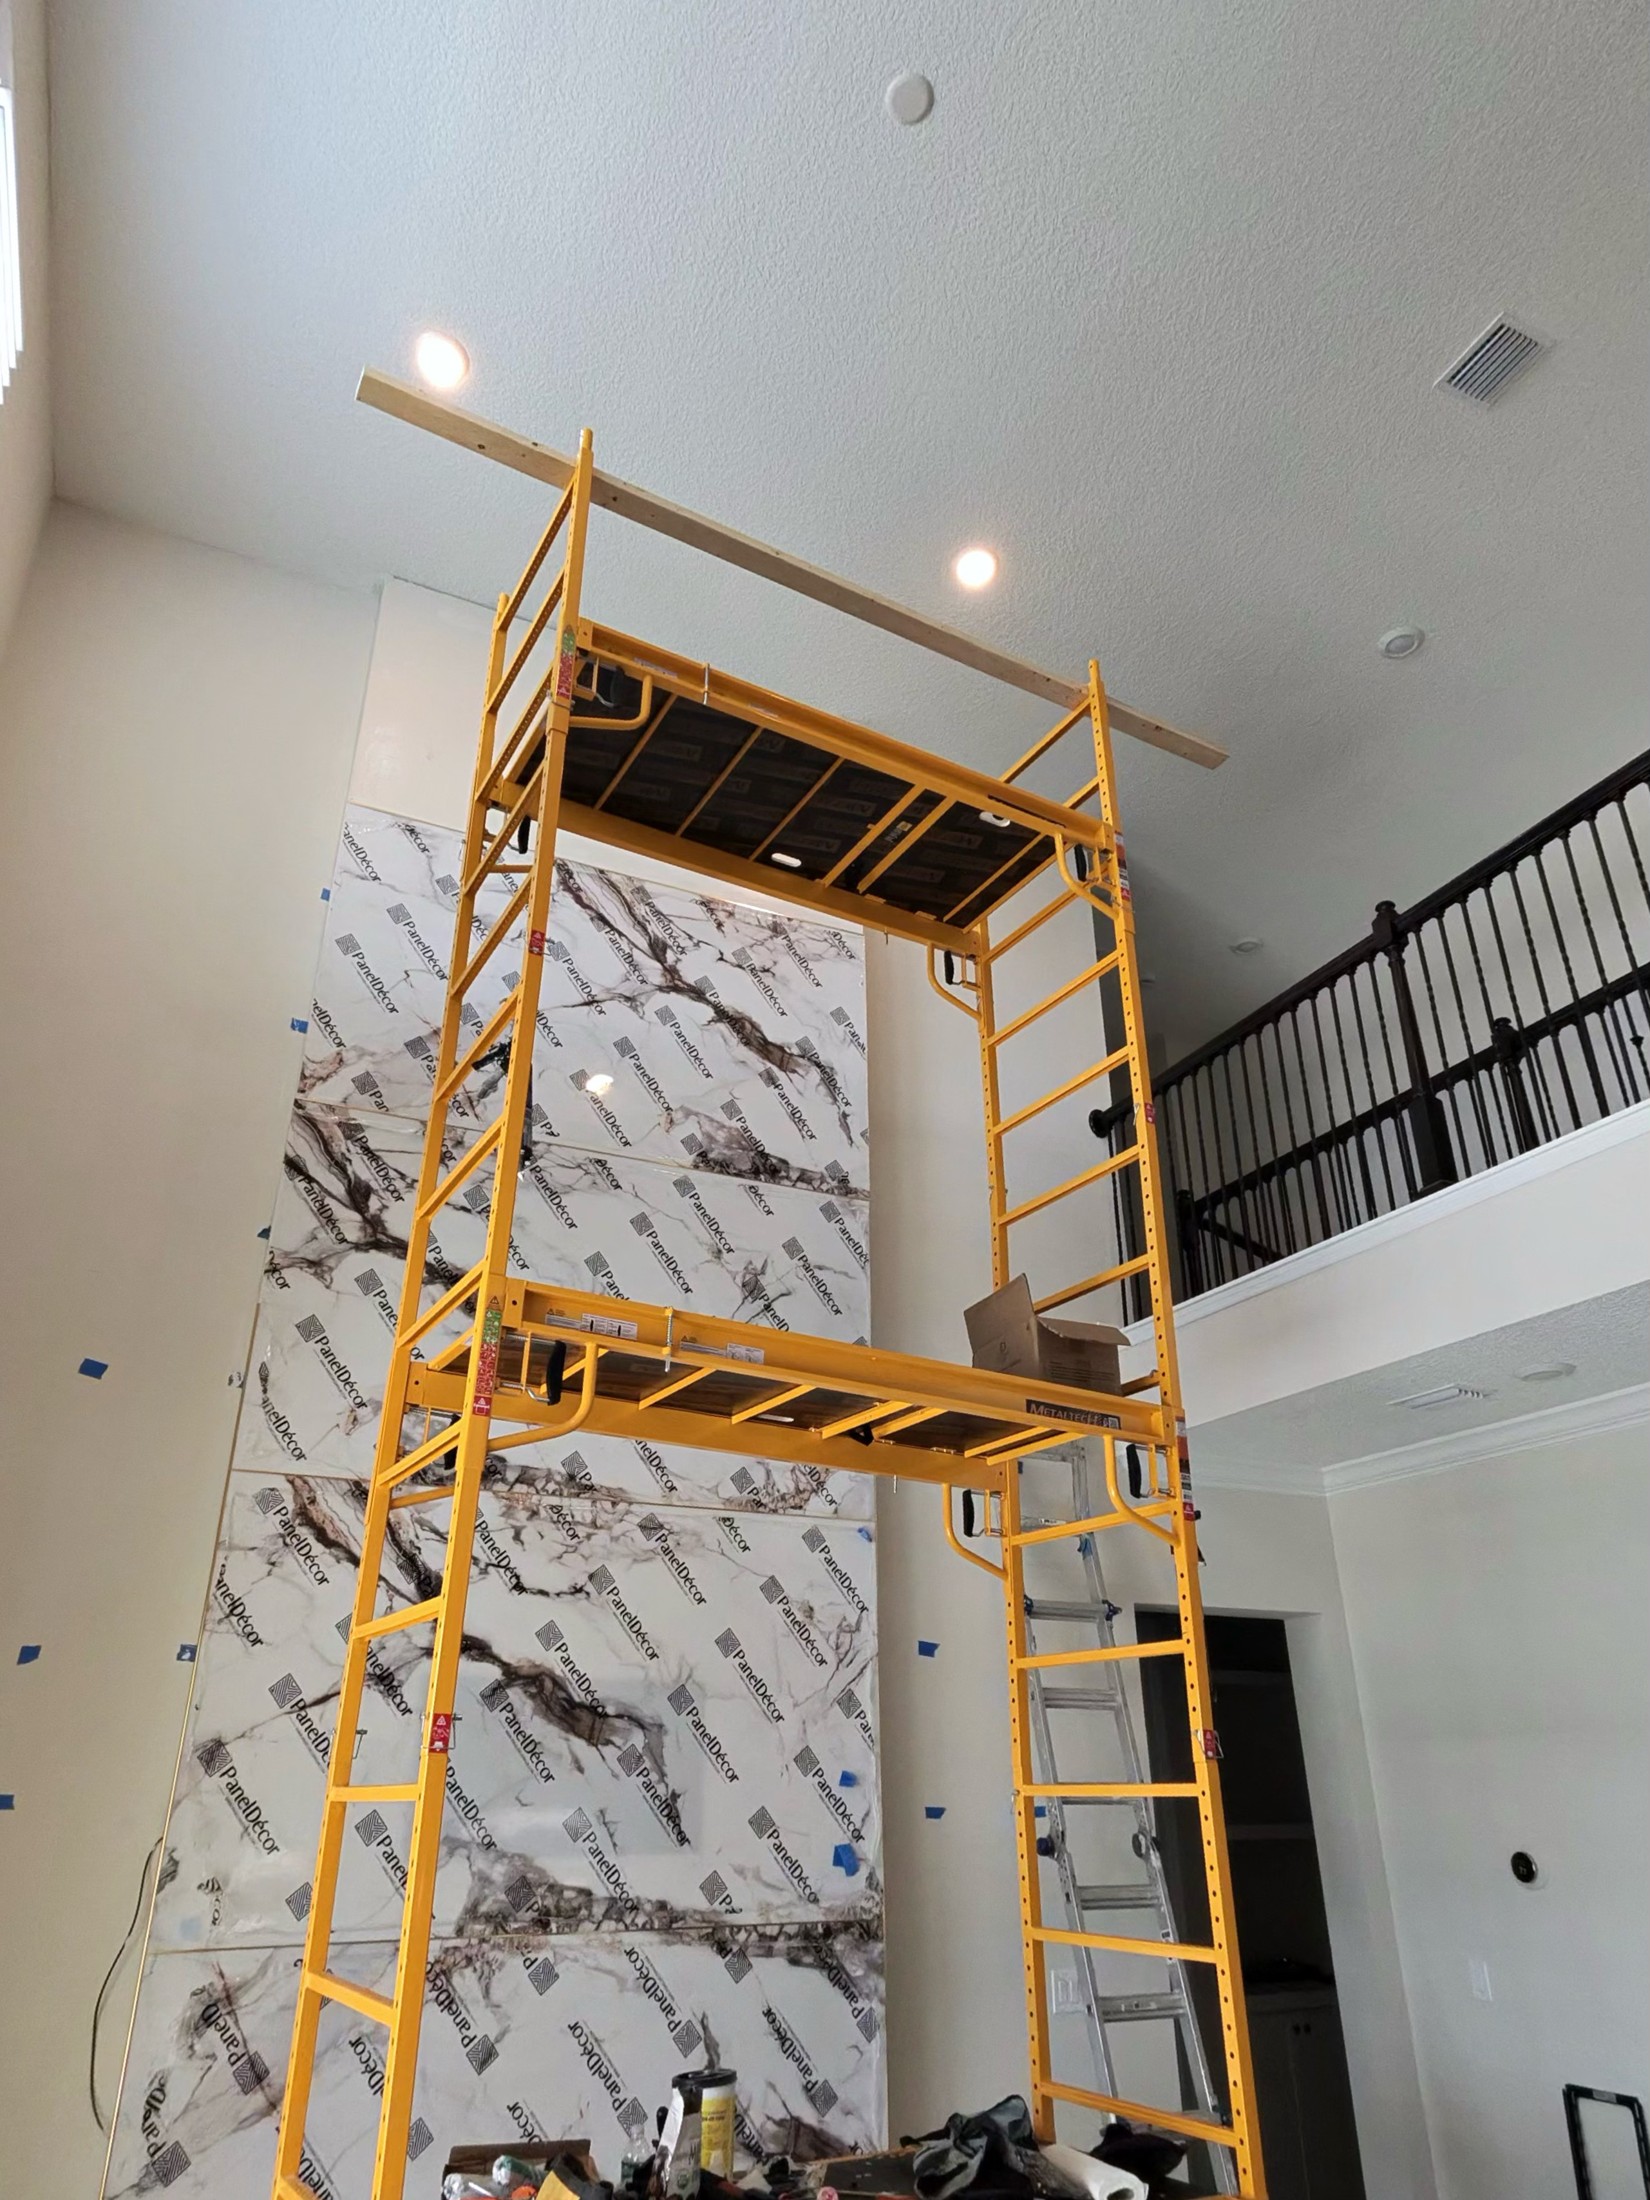
*During construction: the patterned panels are installed while their protective covering is still visible.*
The light center has a pronounced veined pattern and visible horizontal panel divisions. Dark vertical slats on either side provide a finer, repeated texture. Together they establish contrast without needing a different feature on every part of the wall.
The center keeps the television within the main composition, while the slats connect the lower room to the wall's upper height. The dark finish also relates visually to the nearby railing. These are observations of the finished design rather than assumptions about the exact material specification.
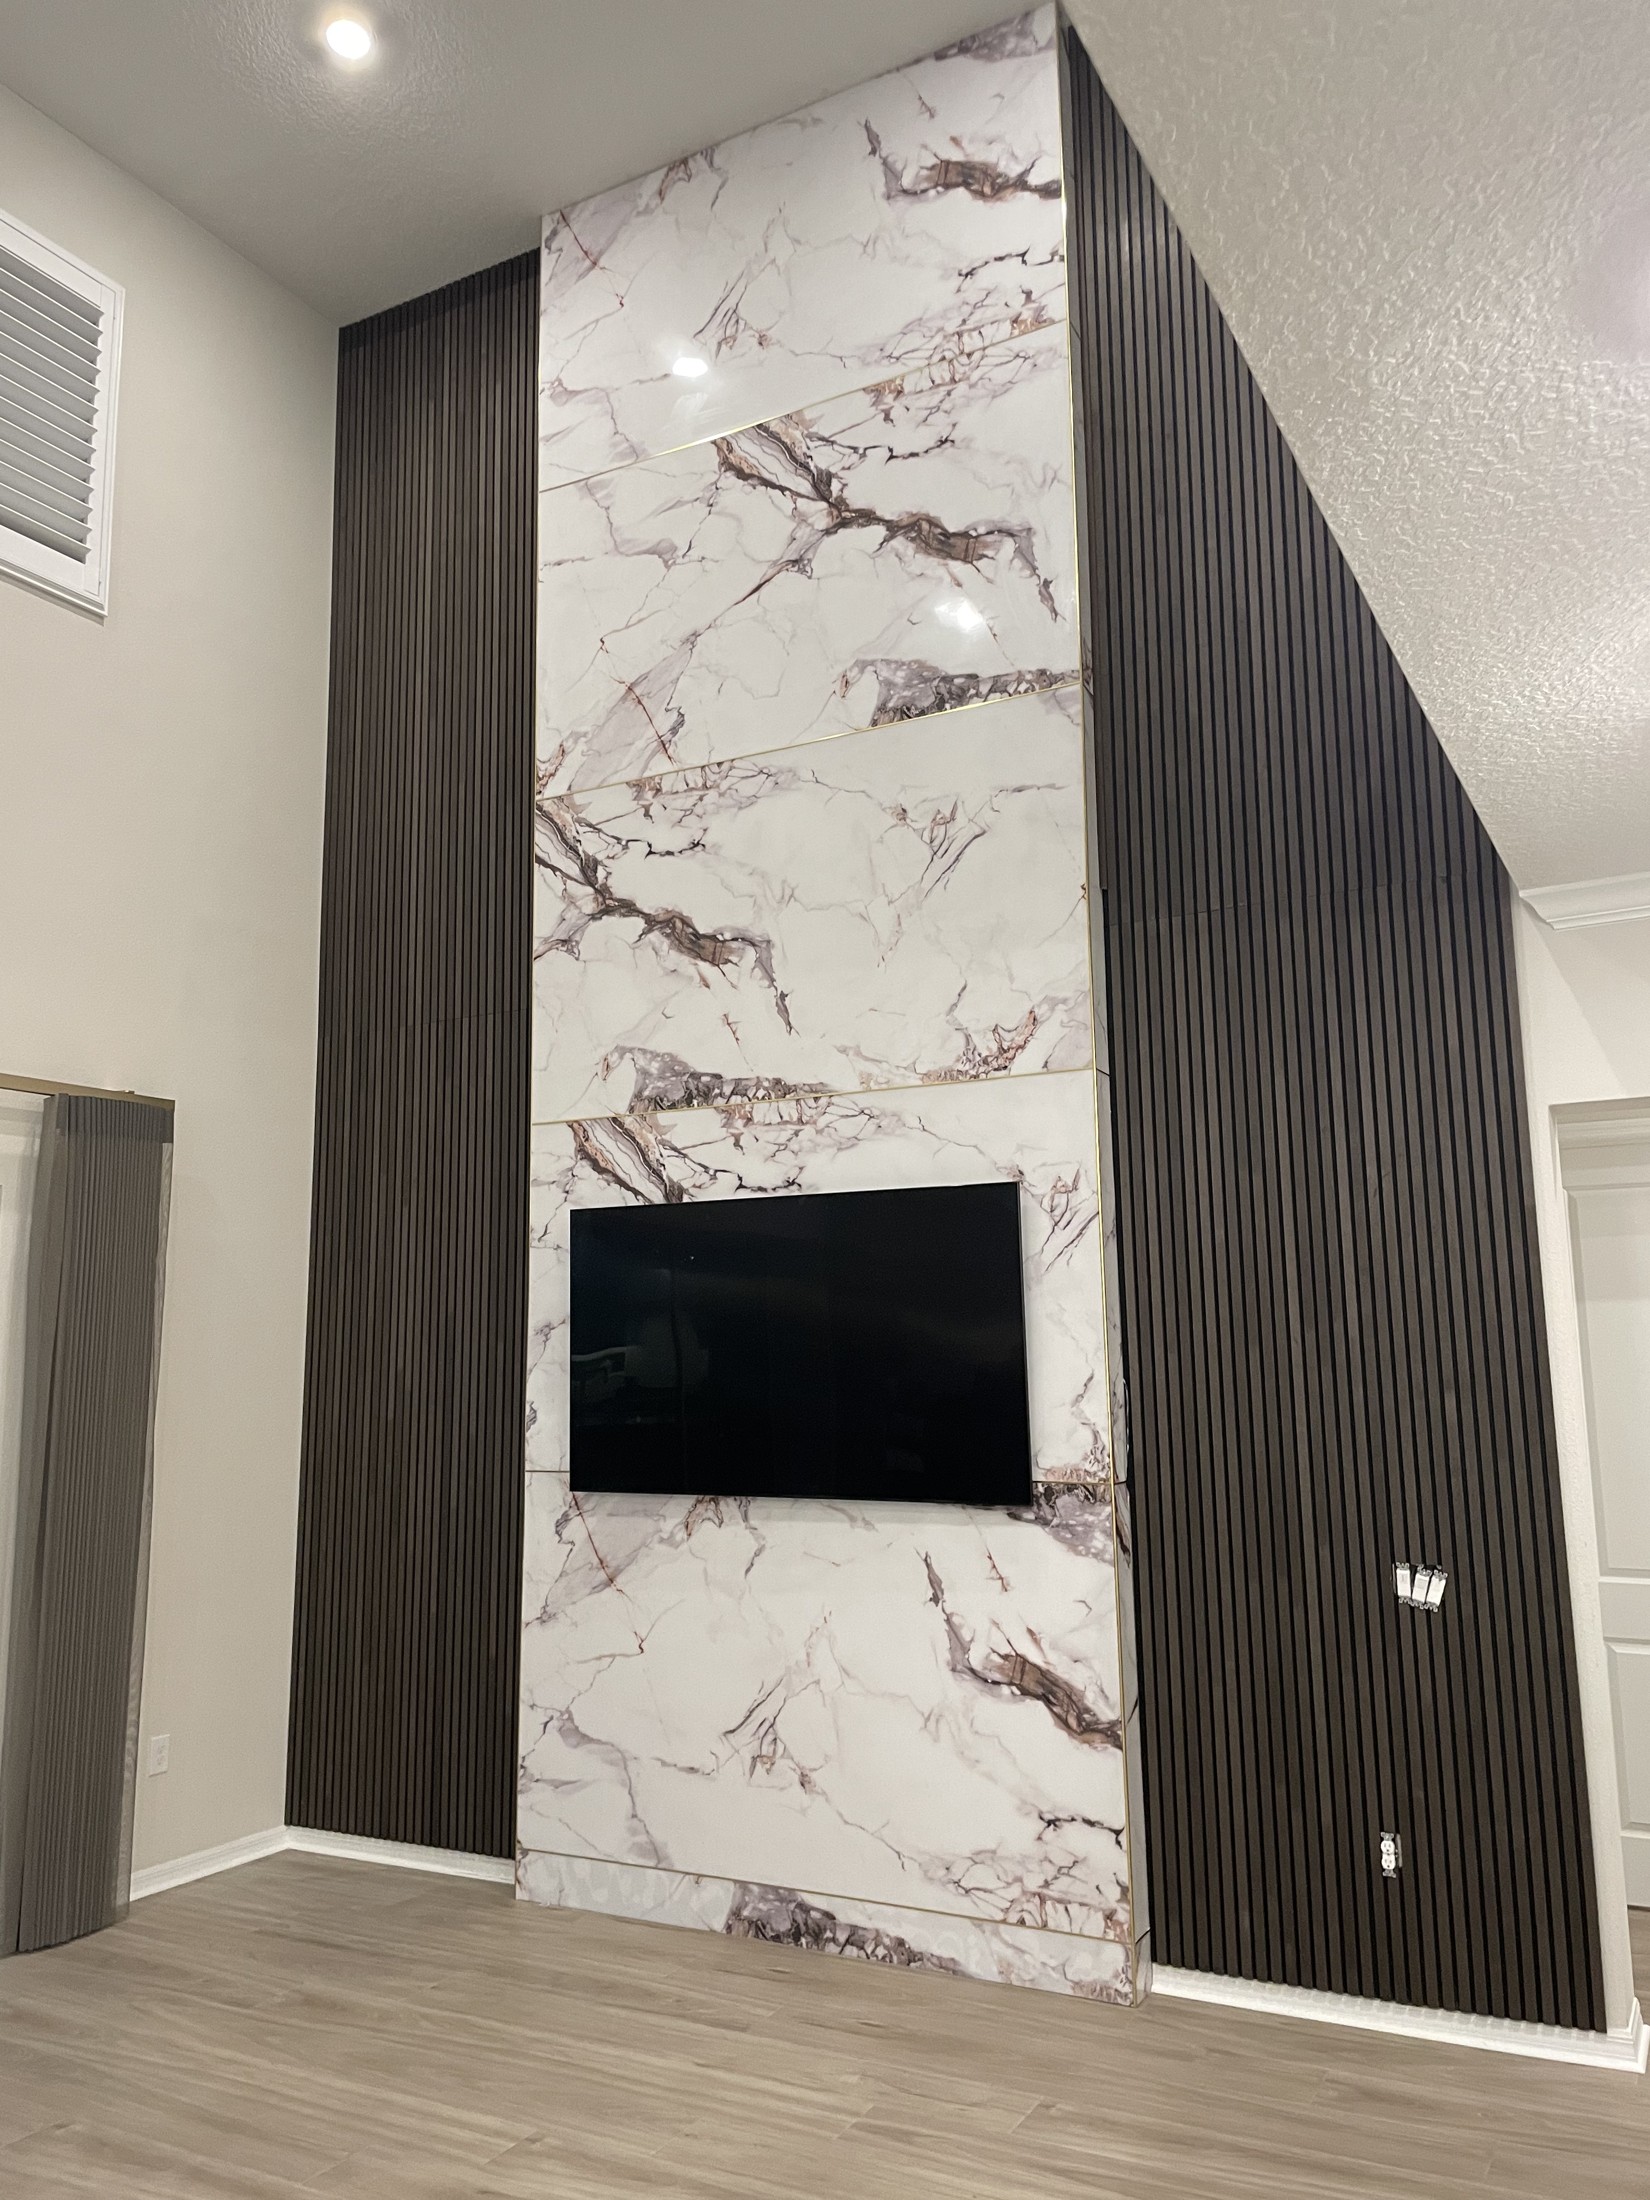
*An intermediate view shows the central finish and side slats before the shelving and lower cabinetry complete the wall.*
Shelving and cabinetry bring the scale back to the room
The later photographs show horizontal shelves across the lower portions of the slat sections. They introduce places for display and break the tall side surfaces into smaller areas closer to the seating level.
Below, a continuous dark wood-look cabinet composition gives the wall a stronger base. The fireplace sits centrally within this lower arrangement. The result combines the tall decorative feature with the practical scale of storage and furniture.
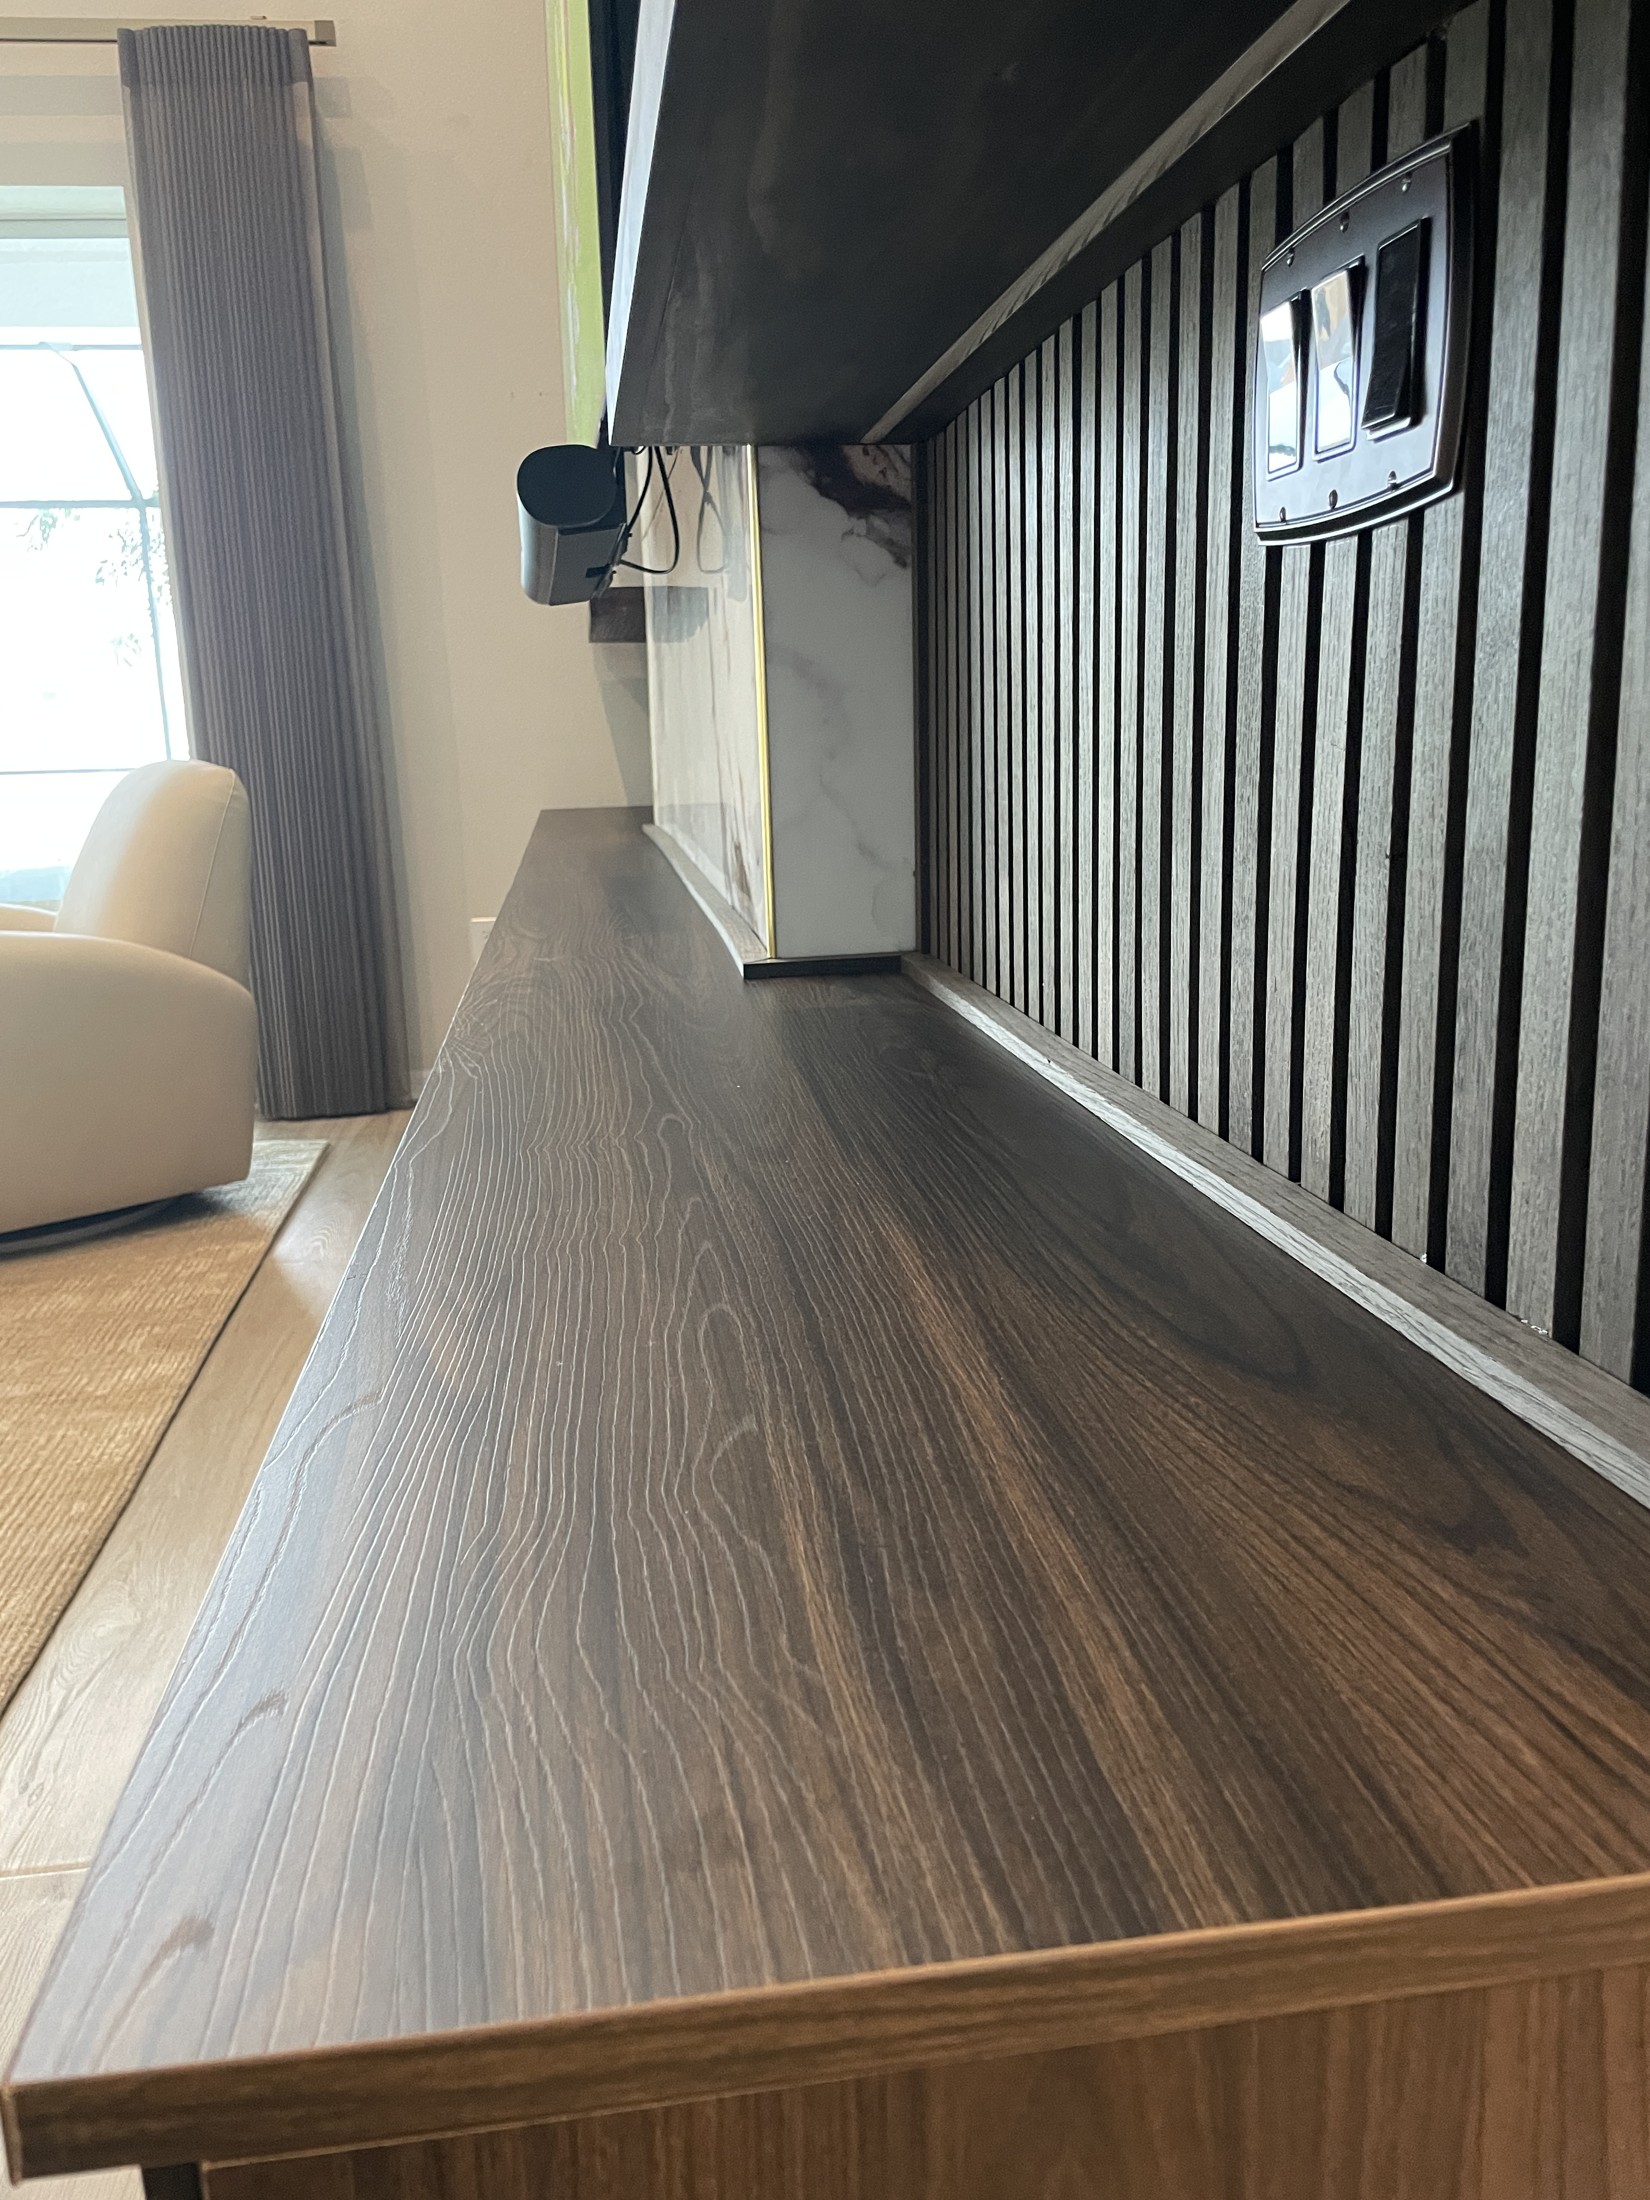
*Detail: the horizontal cabinet surface meets the fine vertical slat pattern and the central feature.*
Lighting changes the evening appearance
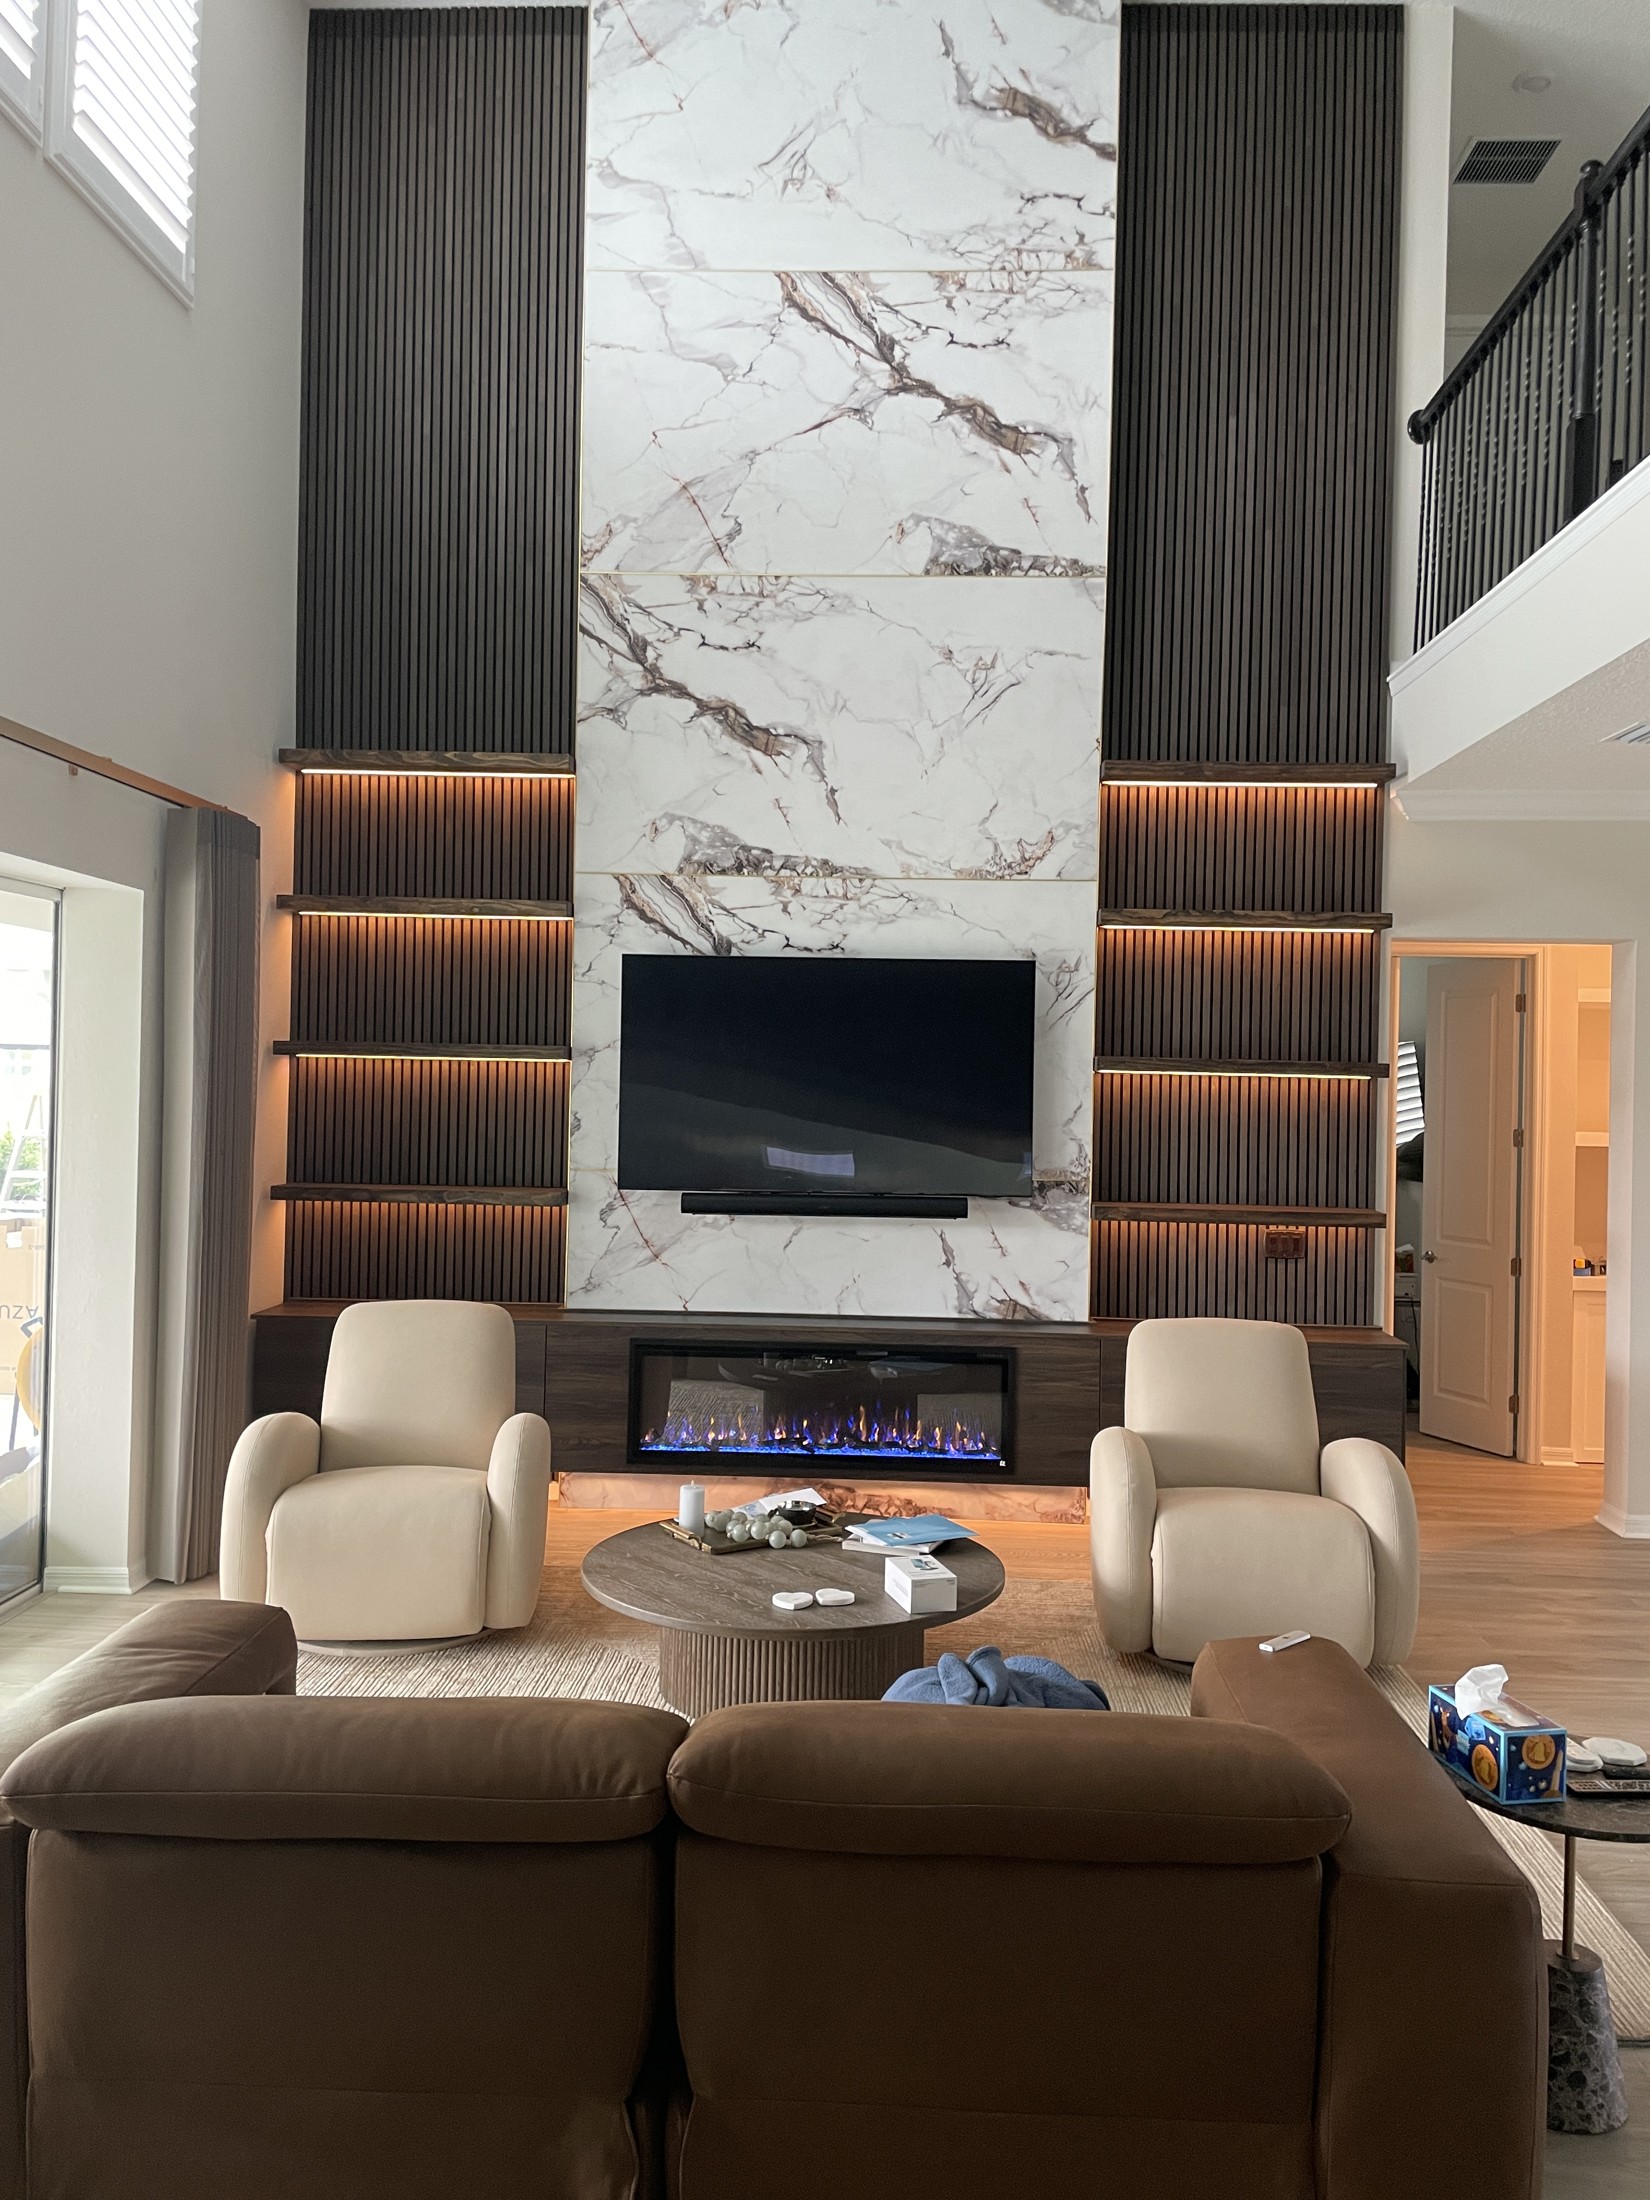
*After: warm lighting beneath the shelves reveals the slat texture, with an additional glow below the base composition.*
The illuminated photographs show why lighting needs to be considered with the millwork. Light beneath the shelves makes the repeated vertical texture more visible and gives each shelf a defined edge. The lower glow helps distinguish the cabinet composition from the floor.
The wall therefore has two different visual scales: a tall central statement and smaller lit areas around the television. The room remains recognizable as the same living space, but the wall now provides a much more complete focal point.
What this project illustrates
- Use height intentionally. The central finish and side slats connect the television area to the upper wall.
- Balance vertical and horizontal elements. Shelves and lower cabinetry prevent the design from relying on vertical lines alone.
- Coordinate storage with the feature. The lower composition belongs to the wall rather than reading as unrelated furniture placed in front of it.
- Plan the lighting with the finish. The shelf lighting emphasizes the texture and proportions already in the design.
This is a design case study, not a construction specification. The photos do not establish appliance clearances, hidden attachment methods or the requirements for another home. A similar project needs its own equipment selection, measurements and site assessment.
Our media wall budget guide explains how those choices affect the scope. You can also explore Feature Walls and Built-Ins & Storage, then send your project details to discuss an appropriate version for your space.