A hidden door can make an everyday doorway feel like part of the room's architecture. Instead of drawing attention to the opening with contrasting trim, the door shares the surrounding wall's finish. The useful question is not simply whether the door can disappear. It is whether the finished wall looks cohesive and the door remains comfortable to use.
This Wall Design Solutions project shows that idea through a real transformation: an existing doorway beside a staircase becomes part of a tall, dark wood-look slat panel. Below, you can see the original opening, installation stages and finished appearance, followed by practical questions to consider for your own home.
If you are exploring custom hidden doors in Orlando or Central Florida, this example is a starting point for discussing your space—not a fixed design you must copy.
The project: from a visible opening to a continuous slat feature
Before the work, the opening had a light-colored perimeter that stood out against the surrounding wall. It sat next to a larger passage and staircase, with storage visible beyond the doorway. The photos show a relatively narrow section of wall extending well above the opening.
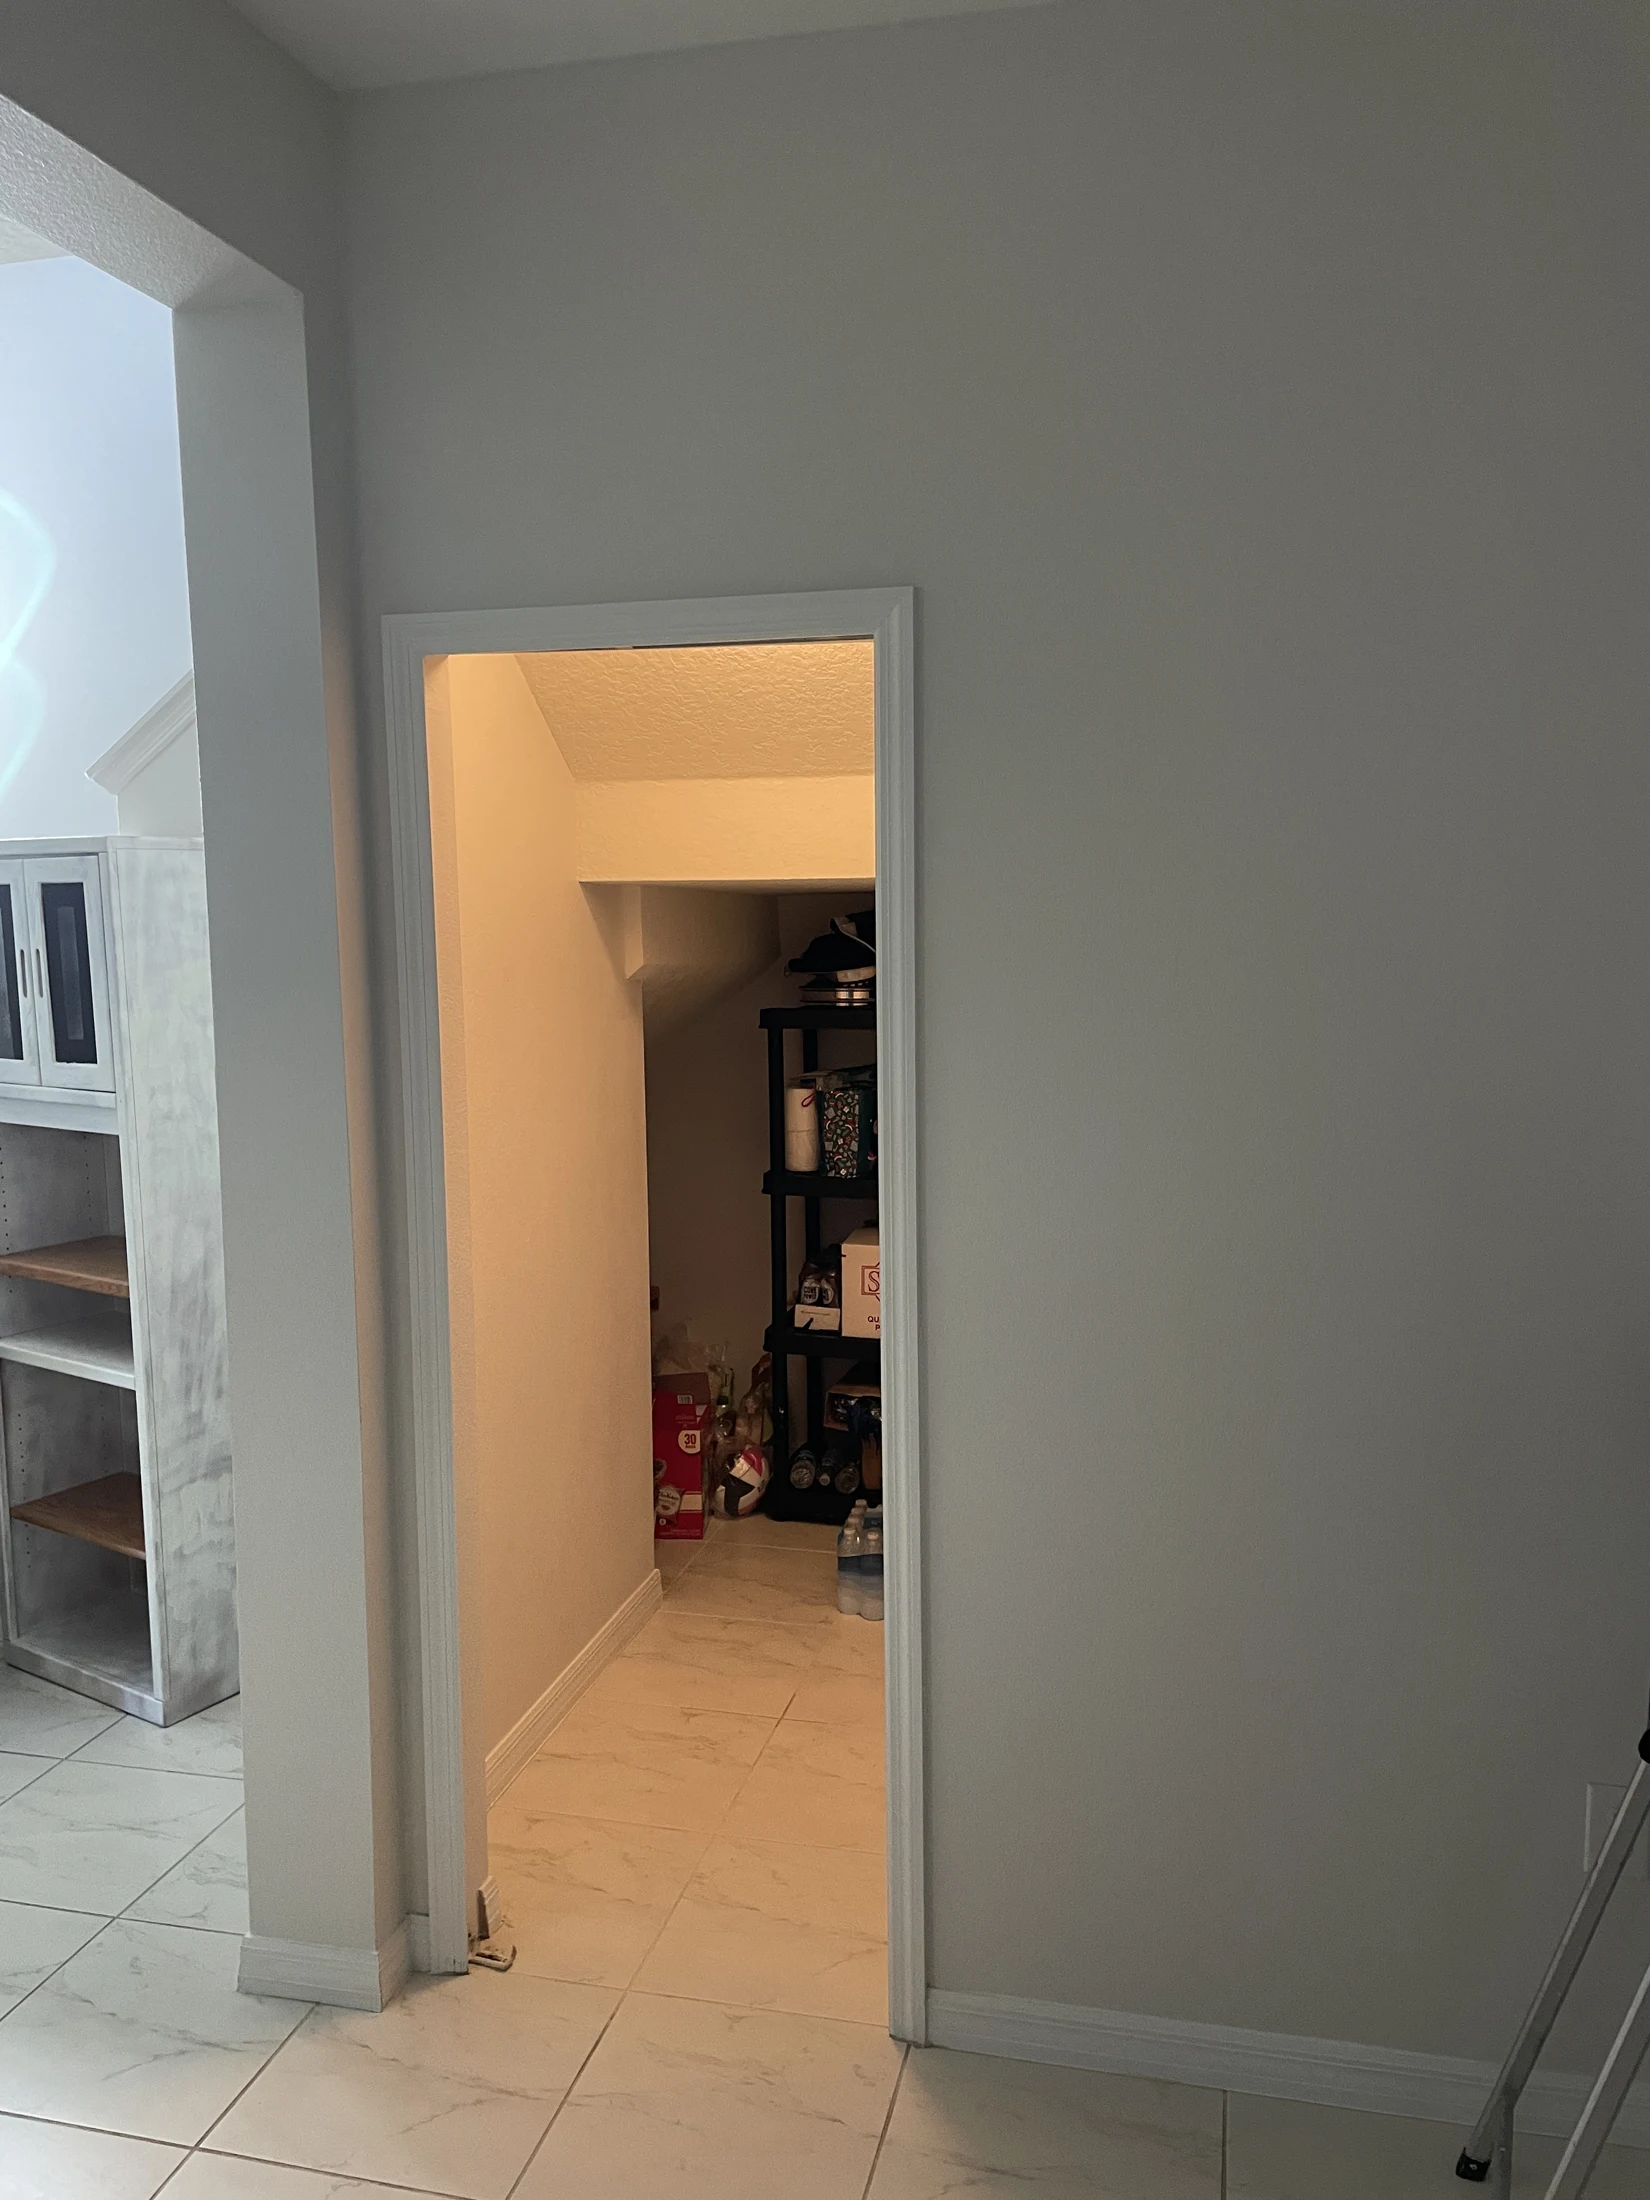
*Before: the doorway and its perimeter are clearly visible within the light-colored wall.*
The finished treatment uses a tall field of closely spaced vertical slats. Dark gaps between the slats create a repeating pattern, while the brown wood-look faces bring contrast to the otherwise light interior. Extending the treatment above the opening makes the door part of a larger architectural finish rather than an isolated decorative panel.
The result illustrates a useful design principle: plan the whole visible wall area around a hidden door. Matching only the moving surface can leave the opening looking separate from its surroundings.
What the installation photographs show
The process photographs include panel sections on a work surface, an early vertical strip beside the opening and a later stage with the unfinished door surface visible. Together, these show how the wall treatment and doorway were developed as a coordinated composition.
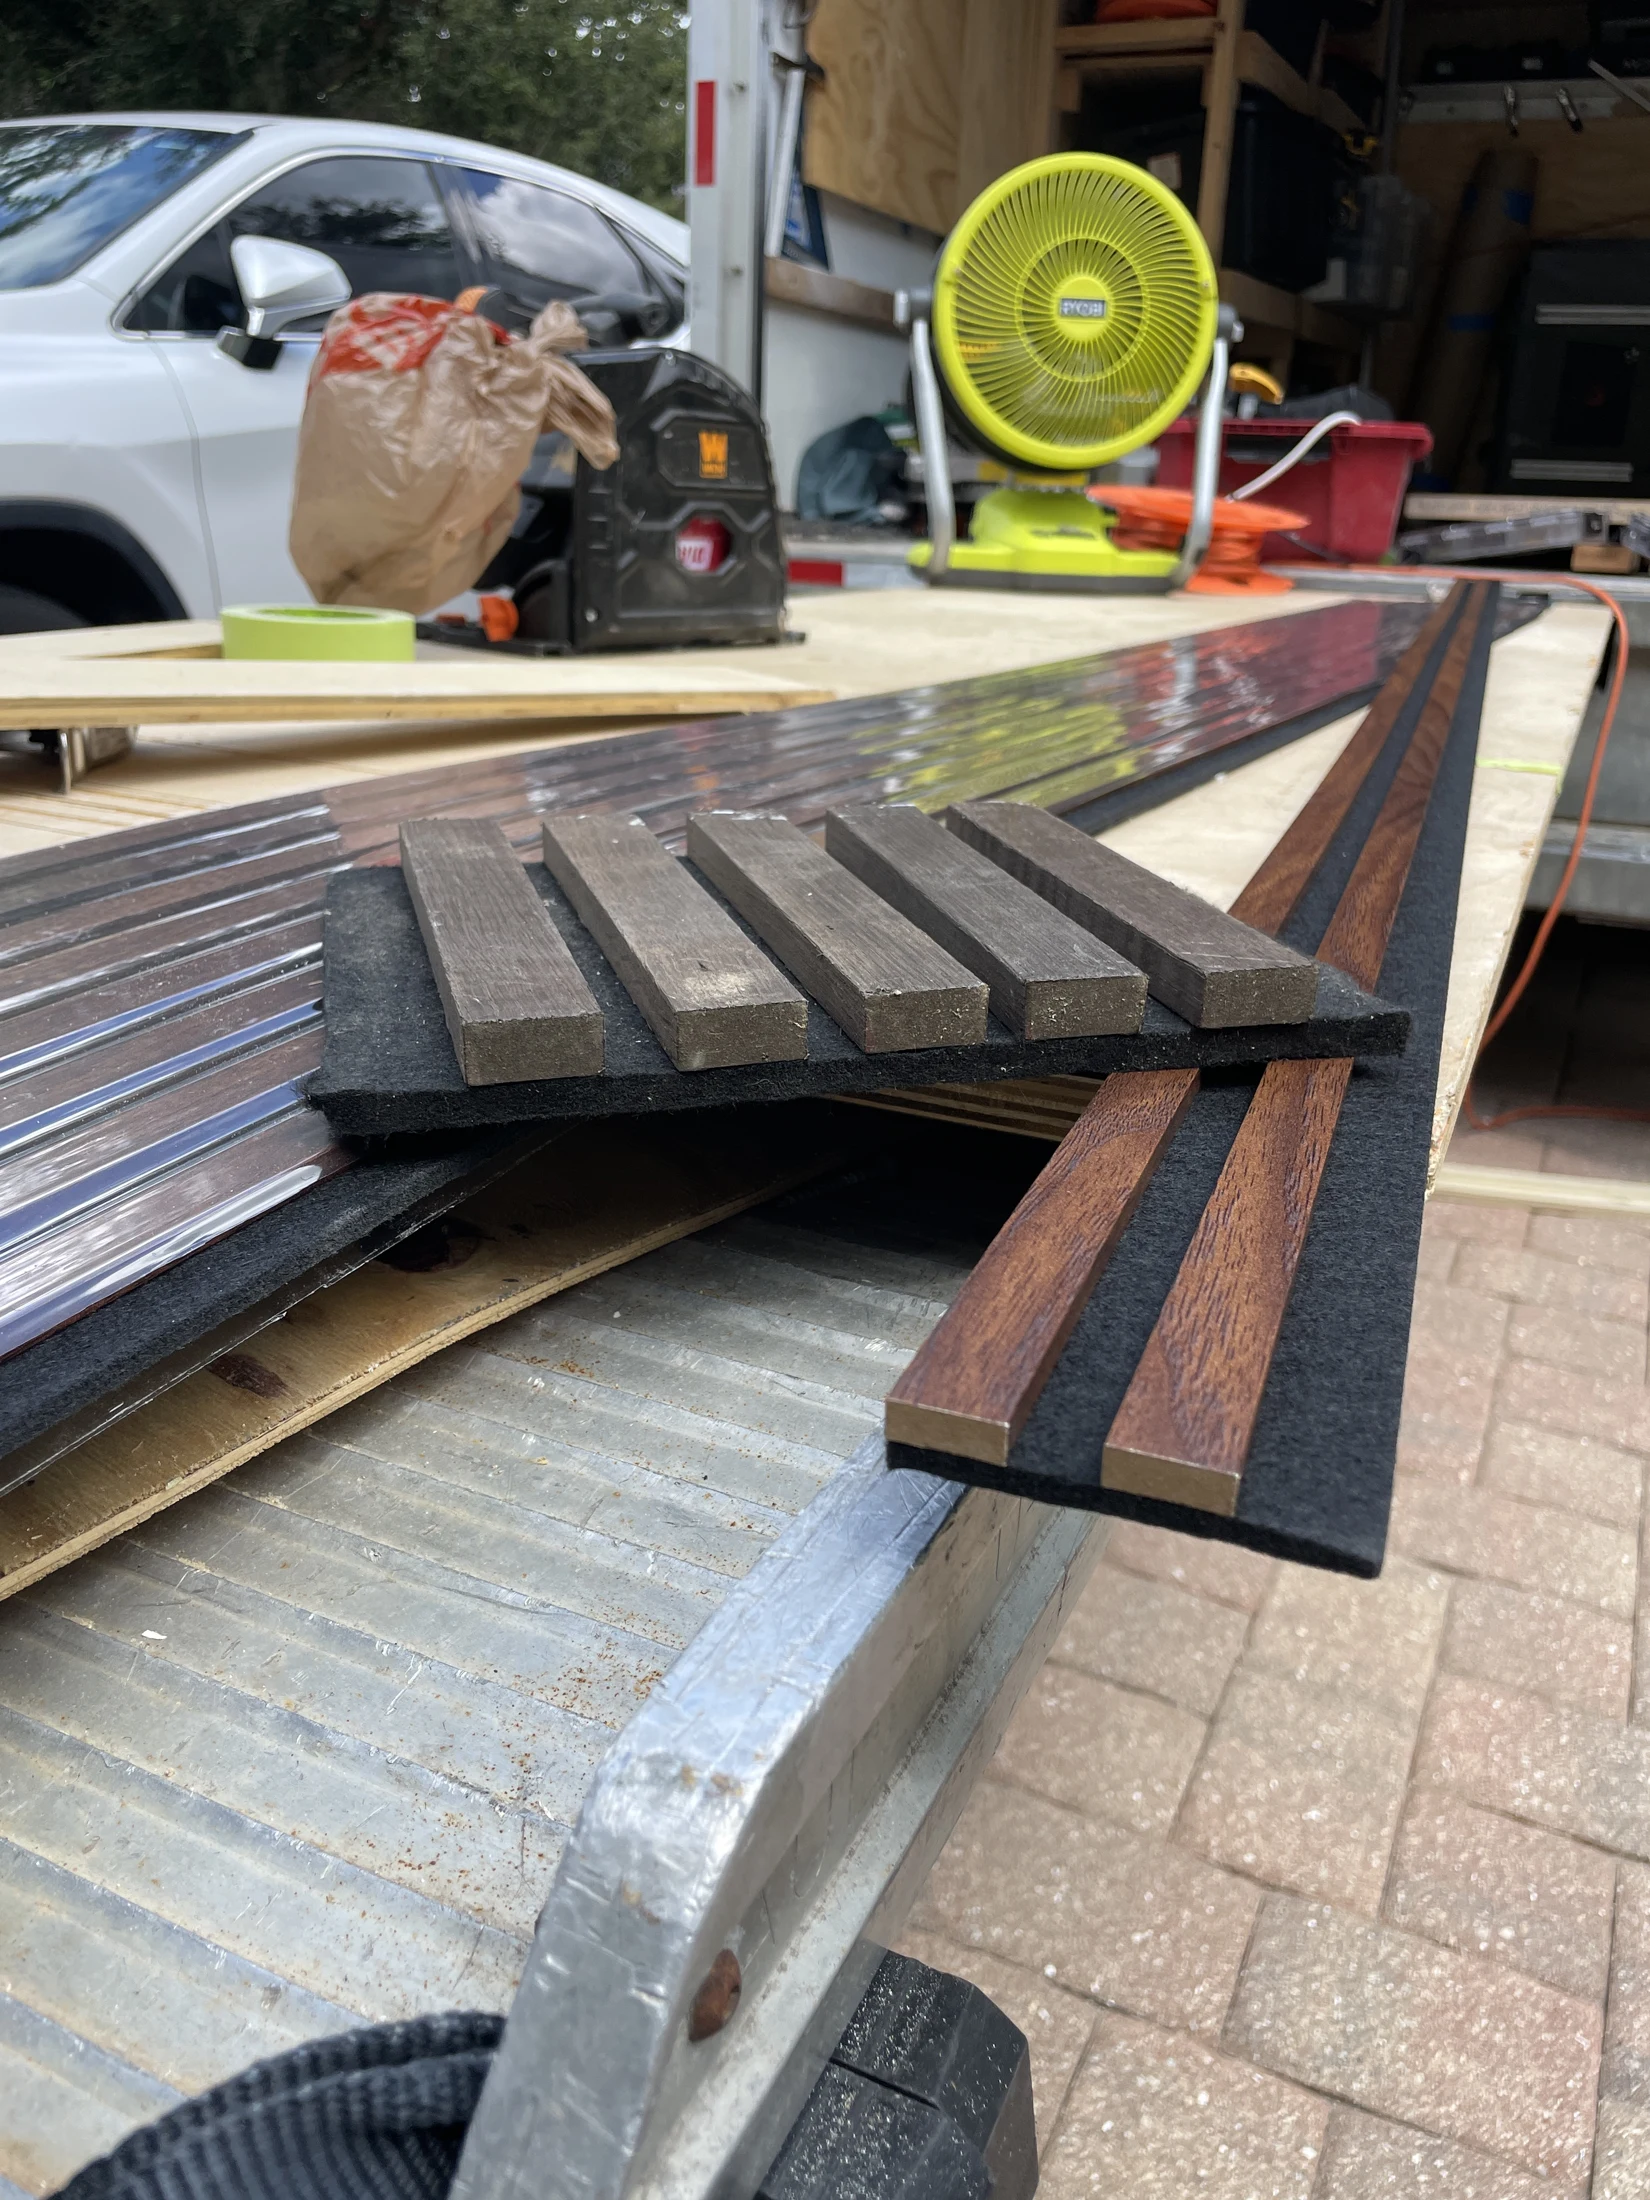
*Panel preparation: the repeating finish is visible before it becomes part of the wall.*
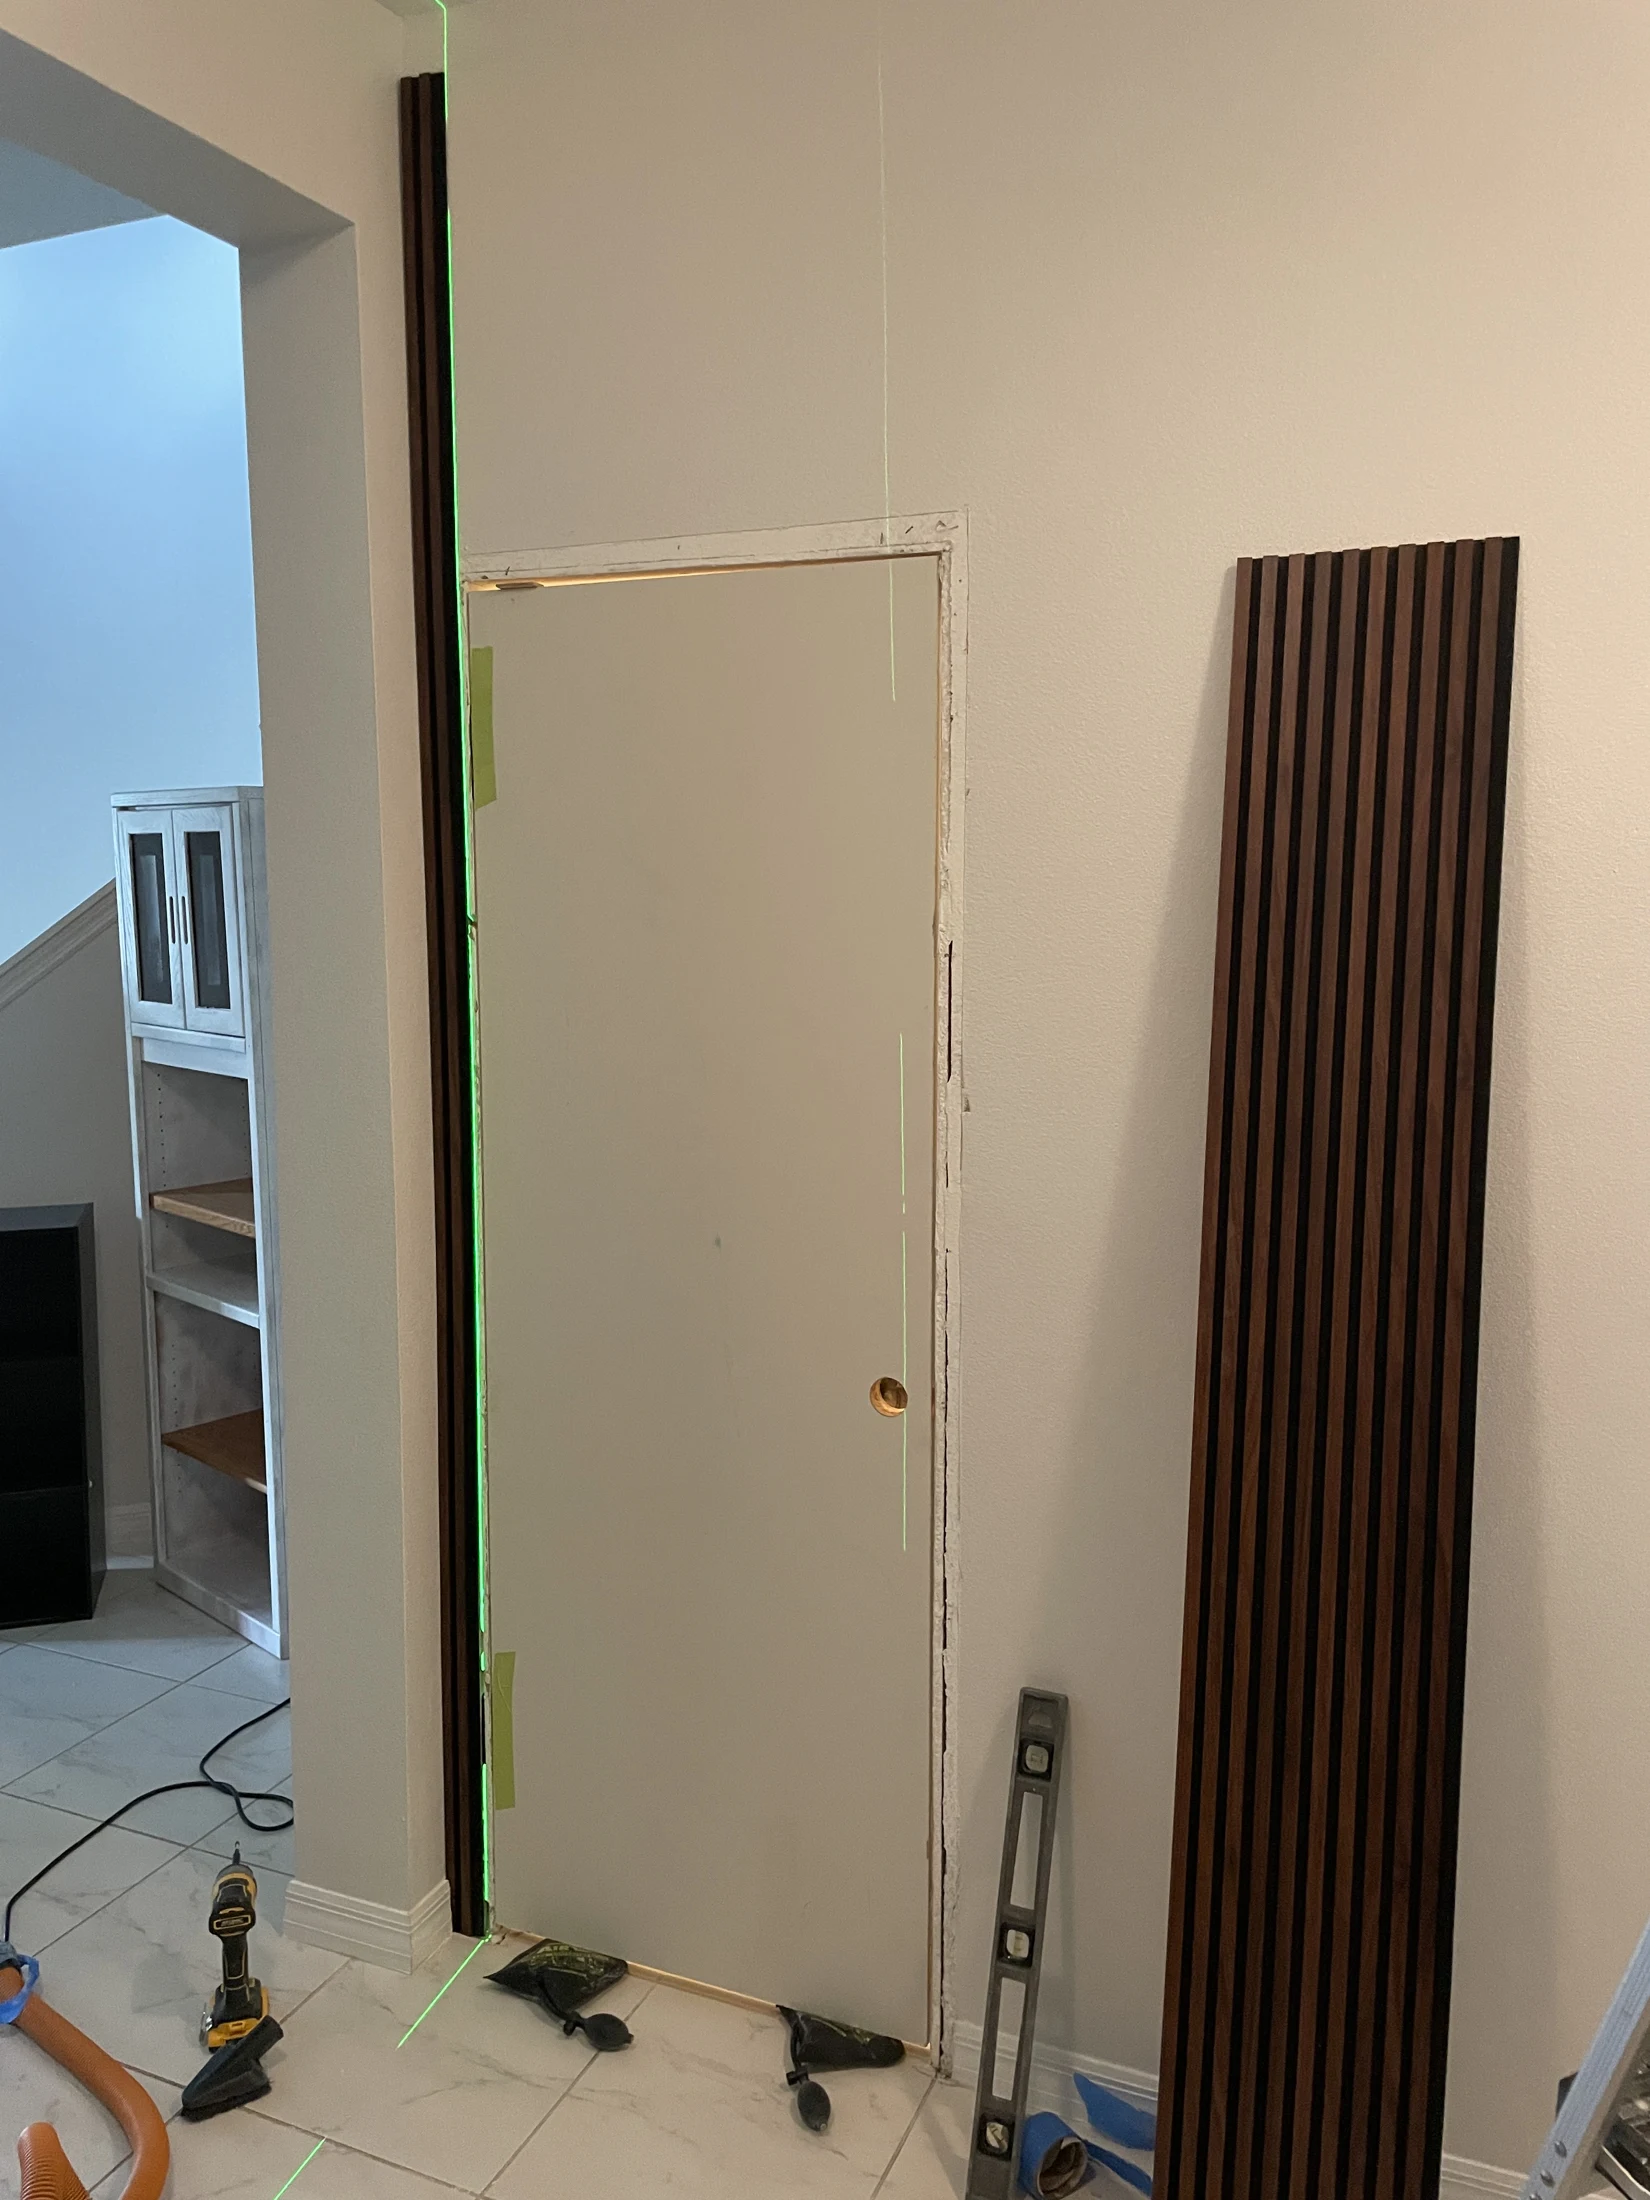
*During installation: the door area and neighboring finish can be seen before the completed slat treatment.*
In the finished views, the repeated vertical lines visually absorb the door into the panel. The surrounding wall remains light and comparatively simple, which gives the dark feature a clear boundary. This restrained contrast is part of what makes the composition easy to read.
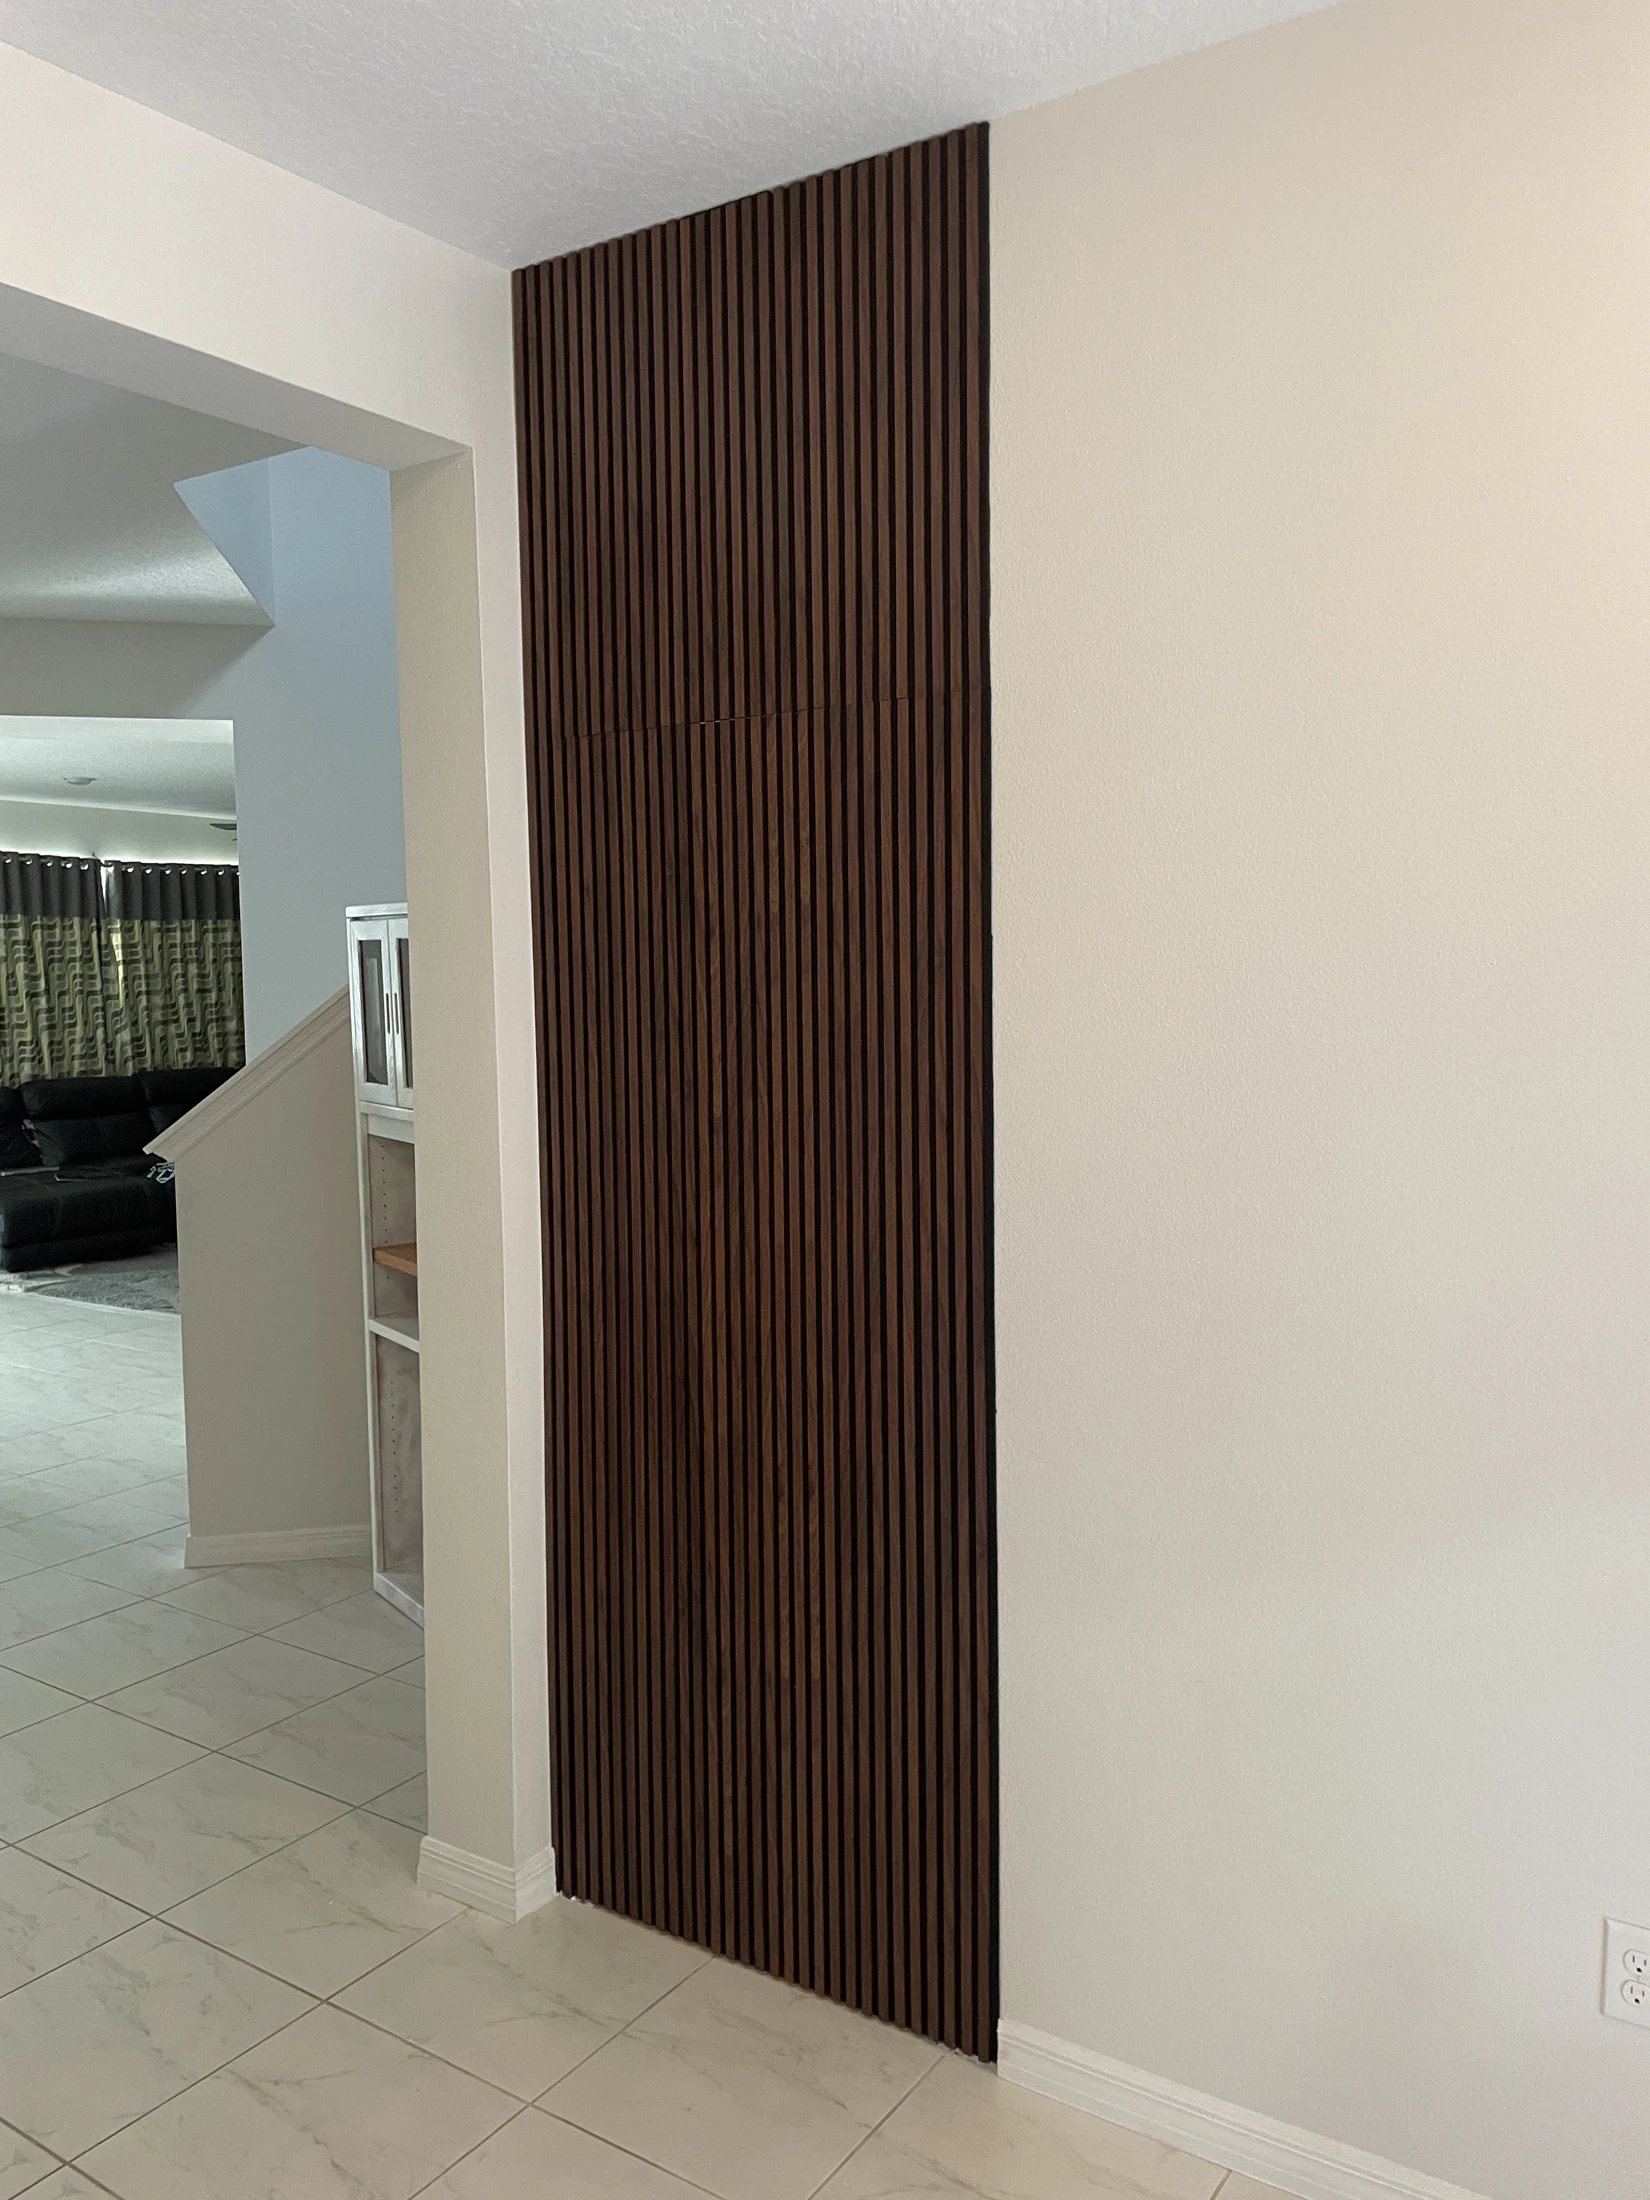
*Finished view: the doorway is integrated into a taller slat feature.*
The photos demonstrate the visual transformation. They do not establish the exact panel composition, hinge model, project cost or installation duration, so those details are not presented as facts about this project.
Is a slat hidden door right for your room?
A slat finish is worth considering when you want texture and a stronger accent. A painted flush door may suit a room where the priority is a quieter wall. Neither approach is automatically better; the decision depends on how much attention the wall itself should receive.
Think about the view from the entrance, sofa and neighboring rooms. In this project, the vertical feature is also visible from farther across the space. That wider view matters: a door can blend well at close range yet feel disconnected from the room when seen from a distance.
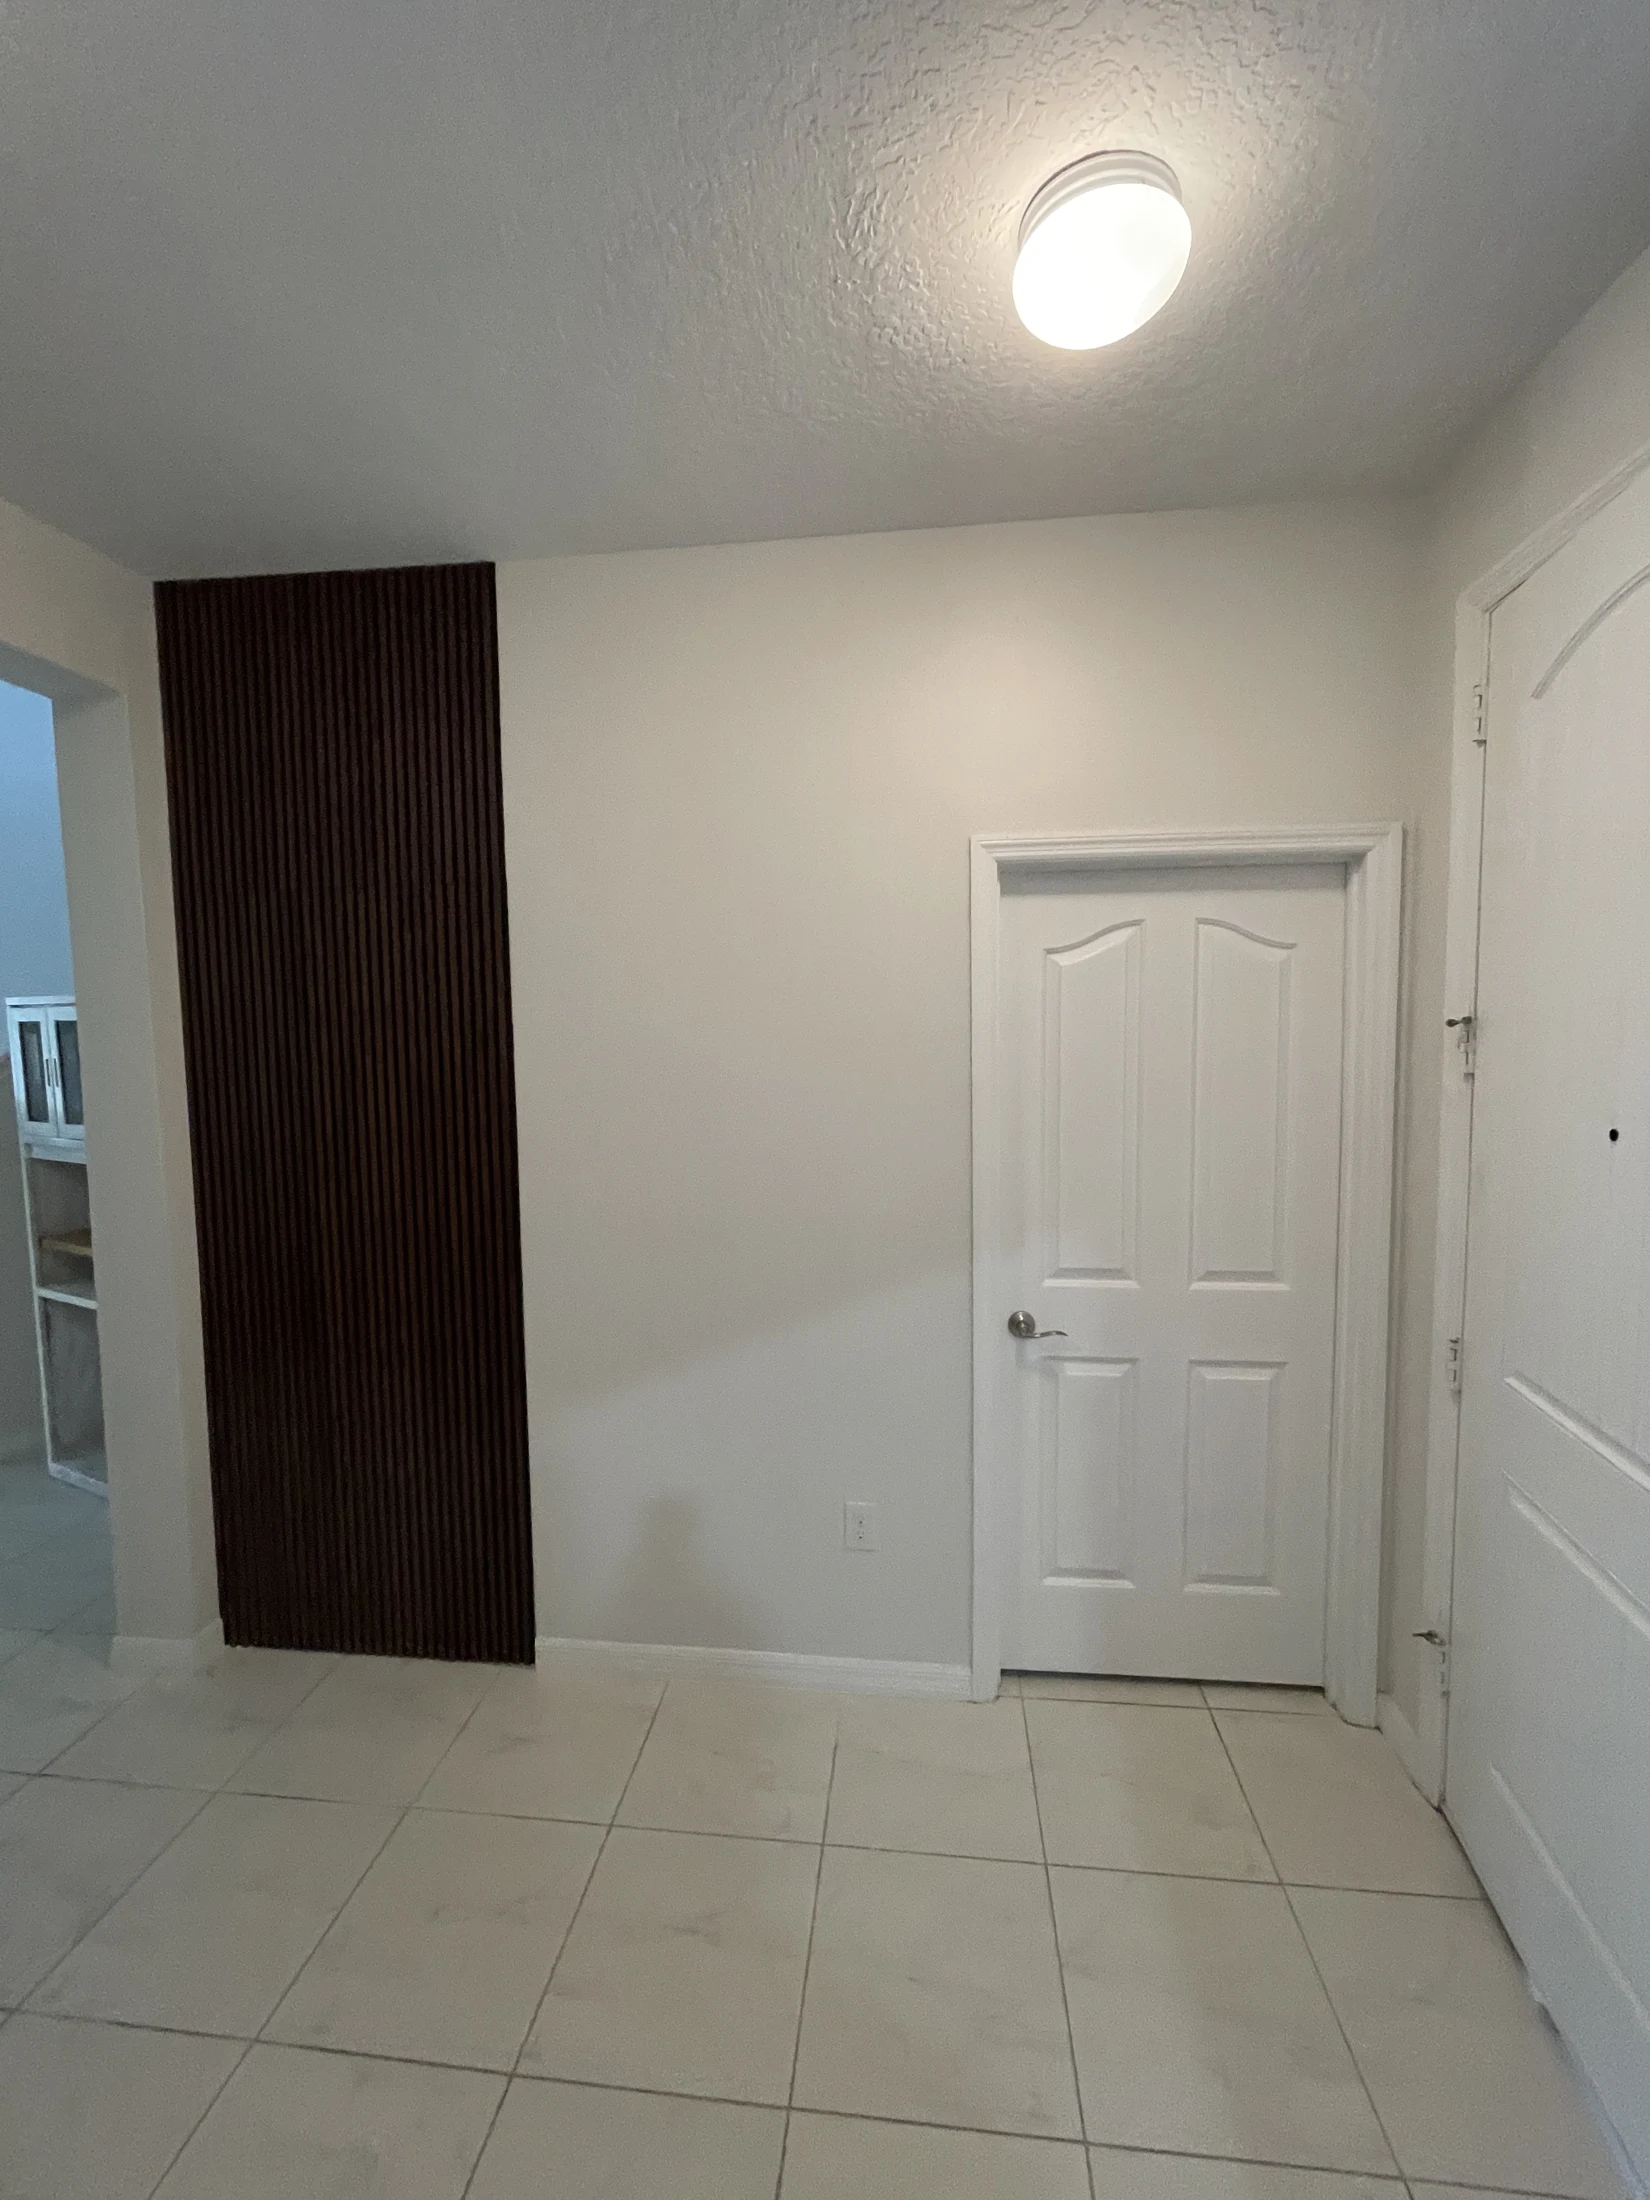
*Room context: the dark vertical feature occupies one part of a larger, light-colored wall.*
A concealed entrance can be considered for storage, a home office or another interior room. Tell your designer how often you use it and whether you need privacy, a lock or a clearly recognizable handle. A door used many times each day needs more than a convincing photograph.
Five decisions to make before ordering a hidden door
1. The opening and surrounding wall
Share photographs of both sides of the doorway. The opening, existing trim and nearby wall finishes affect how the new treatment can meet the room. An existing doorway may be usable, but its condition and construction need assessment before the scope is confirmed.
2. The swing and everyday access
Decide which direction the door should open and check what sits in its path. Nearby furniture, another doorway or a change in floor level can affect the layout. Discuss how the door will be operated from both sides, including any privacy requirement.
3. The finish pattern
Look at where the slats begin and end, how they meet the door edges and how the treatment transitions into the ceiling and floor. Ask to see a material sample in your room's lighting. A dark wood-look finish can appear different beside warm lamps and in daylight.
4. The hardware and finished door weight
The door, finish and hardware need to be selected together. Added cladding changes the assembly that the hardware must support. Manufacturer specifications vary by model; for example, SIMONSWERK's concealed hinge range includes different load capacities and configurations. This is a general planning reference, not a claim that this brand was used in the photographed project.
5. The opening detail and final adjustment
A hidden door still needs working clearances. Ask how the perimeter will look when closed and how the finished door will be checked for opening, closing and contact with adjacent surfaces. A subtle joint is a more realistic expectation than a promise of a completely invisible seam from every angle.
What affects the cost of a custom hidden door?
The price depends on the opening size, materials and complexity. A meaningful proposal should define the door and hardware, surrounding panel area, preparation, finishing and installation. Comparing only the door panel price can miss much of the work that creates the finished appearance.
- Existing opening: whether it can be retained or needs changes.
- Finish coverage: the door alone or a larger wall composition.
- Material selection: the chosen panel system, finish and edge details.
- Hardware and operation: the selected opening and privacy arrangement.
- Preparation and finishing: work needed where the new installation meets existing surfaces.
For this project, we are showing the design and construction photographs rather than publishing an unverified price. For your home, send the opening dimensions and photos so we can discuss the likely scope before developing a proposal.
Artem helps assess your needs, develop a design and consider the budget; he also carries out carpentry and installations on projects he handles personally. The first conversation is free. You can use our contact form or the website's WhatsApp button to speak with a real person about your space.
Explore Architectural Finishes for the wider service category, or read our guide to photographing and measuring a wall for an estimate before sending your inquiry.